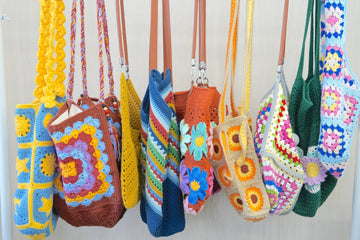
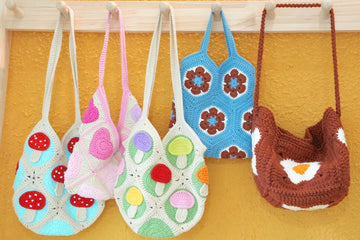
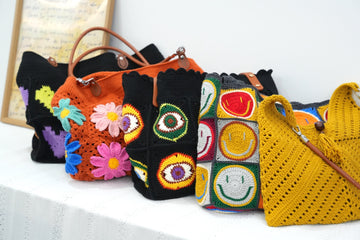
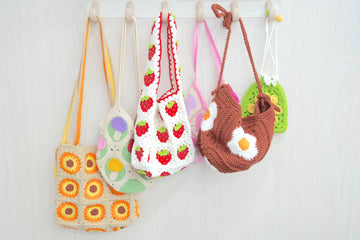
Summer is calling, and what better way to hit the beach than with a handmade crochet bag that's both stylish and practical?
Whether you're a beginner or an experienced crocheter, these 33 free patterns will help you create the perfect companion for your beach adventures. From roomy totes to mesh designs that let the sand slip right through, there's a pattern here for everyone.
Ready to start crocheting your perfect beach bag? Let's dive into these fantastic free patterns that will have you beach-ready in no time!
Pin for later

Crochet Beach Bag Patterns List
1. Crochet Granny Square Beach Bag

This cheerful beach bag combines six colorful granny squares bordered in soft gray, featuring a vibrant mix of blue, pink, red, green, white, and cream in a playful circular pattern. The unique button closure adds a practical touch to this lightweight summer accessory.
Check Granny Square Beach Bag Free Pattern
2. Crochet Granny Square Bottom Bag

This summery beach tote features a striking chevron pattern in a vibrant palette of navy blue, coral, yellow, mint green, and white, complemented by brown leather handles. The rounded bottom design and textured stitch pattern create a perfectly balanced beach-ready accessory.
Check Granny Square Bottom Bag Free Pattern
3. Crochet Granny Square Shopping Bag

This whimsical granny square shoulder bag features a sweet pastel palette of baby blue, pink, royal blue, and yellow, creating a charming floral motif throughout the connected squares. Perfect for spring shopping or seaside trips, it offers a delightfully retro aesthetic.
Check Granny Square Shopping Bag Free Pattern
4. Crochet Granny Square Bucket Bag

This elegant bucket bag combines a deep forest green body with a band of delicate granny squares featuring pastel flower motifs in lavender, peach, and mint with sunny yellow centers. The airy stitch pattern and matching handles create a perfect spring-to-summer accessory.
Check Granny Square Bucket Bag Free Pattern
5. Crochet Big Granny Square Tote Bag

This vibrant granny square tote bag features a stunning mandala-inspired design in terracotta, sky blue, yellow, and lilac, complete with a colorful braided strap and decorative tassels. The spacious bottom section showcases a delicate shell stitch pattern, making it both beautiful and practical.
Check Big Granny Square Tote Bag Free Pattern
6. Crochet Mushroom Granny Square Bag

This playful round shoulder bag features whimsical mushroom motifs in candy-colored caps (pink, red, yellow, lime, and purple) with mint green stems on a cream granny square base. The petite size and unique design make it a charming accessory for casual outings.
Check Mushroom Granny Square Bag Free Pattern
7. Crochet Large Granny Square Bag

This eye-catching tote features a rustic orange base adorned with colorful daisy appliques in mint, pink, purple, and blue, each centered with sunny yellow centers. Brown leather handles and an open-work stitch pattern add both style and functionality to this springtime bag.
Check Large Granny Square Bag Free Pattern
8. Crochet Sunburst Granny Square Bag

This charming drawstring bag showcases vibrant sunflower-inspired granny squares in shades of orange and yellow with brown centers, set against a warm beige background. The coordinating two-tone drawstring closure adds a playful touch to this summer-ready accessory.
Check Sunburst Granny Square Bag Free Pattern
9. Crochet Solid Granny Square Bag

This sunny yellow hobo bag features an airy granny square pattern perfect for beach days, with brown leather handles adding a sophisticated touch. The lightweight design and matching tassel make it an ideal companion for seaside adventures or summer outings.
Check Solid Granny Square Bag Free Pattern
10. Crochet Star Granny Square Bag

This whimsical beach tote features a celestial pattern of yellow stars, suns, and moons on sky-blue granny squares, with a playful twisted yellow strap. The spacious design and breezy openwork make it perfect for carrying seaside essentials on sunny beach days.
Check Star Granny Square Bag Free Pattern
11. Crochet Marina Beach Bag

This nautical-inspired beach bag features graduated navy and cream stripes in a classic maritime pattern. Crafted with sturdy twisted rope handles and a roomy design, it offers both seaside style and practical functionality.
Check Crochet Marina Beach Bag Free Pattern
12. Crochet Summer Stripes Beach Bag

This dreamy beach bag features gentle gradient stripes in white, peach, and soft gray tones. The roomy design, braided rope handles, and delicate color transitions create a perfect companion for summer adventures.
Check Crochet Summer Stripes Beach Bag Free Pattern
13. Crochet Summer Beach Bag

This vibrant beach tote combines coral red and aqua stripes on a neutral beige base, featuring a textured cross-stitch pattern that creates a playful, summery design perfect for seaside adventures.
Check Crochet Summer Beach Bag Free Pattern
14. Crochet Beach Tote Bag

This cheerful beach tote features a sunset-inspired gradient from hot pink to yellow and lime green, with delicate lacy stripes creating an airy texture perfect for carefree summer days.
Check Crochet Beach Tote Bag Free Pattern
15. Crochet Sunshine Shell Beach Bag

This radiant yellow crochet tote features an elegant scalloped shell pattern and matching rope handles, creating the perfect blend of beachy charm and practical elegance for your coastal getaways.
Check Crochet Sunshine Shell Beach Bag Free Pattern
16. Crochet Coastal Beach Hobo Bag

This carefree crochet bag features sun-washed coral, turquoise, and yellow stripes, complete with whimsical tassels that capture the laid-back spirit of endless summer days.
Check Crochet Coastal Beach Hobo Bag Free Pattern
17. Crochet Mediterranean Beach Tote Bag

This sophisticated crochet bag features a bold geometric pattern in nautical blue and sandy beige, creating a timeless piece that brings a touch of coastal elegance to your summer outings.
Check Crochet Mediterranean Beach Tote Bag Free Pattern
18. Crochet Turquoise Beach Bag

This refreshing aqua-colored crochet tote with an airy mesh pattern, is perfect for breezy beach days and casual summer adventures.
Check Crochet Turquoise Beach Bag Free Pattern
19. Crochet Bohemian Beach Square Bag

This charming granny square tote features delicate turquoise flowers on cream backgrounds with chocolate brown trim, perfect for bringing a touch of vintage-inspired whimsy to your beach adventures.
Check Crochet Bohemian Beach Square Bag Free Pattern
20. Crochet Rainbow Beach Bag

This playful crochet tote features vibrant granny squares with blooming flower motifs in a kaleidoscope of colors, set against a crisp white background for the perfect blend of summer fun and handcrafted charm.
Check Crochet Rainbow Beach Bag Free Pattern
21. Crochet Classic Beach Bag

The nautical-inspired crochet tote features crisp navy and white stripes with playful fuchsia trim, complete with twisted rope handles and a roomy interior - perfect for carrying all your seaside essentials in style.
Check Crochet Classic Beach Bag Free Pattern
22. Crochet Asbury Beach Bag

This retro-inspired drawstring beach tote showcases cheerful coral, mint, and cream stripes in a breezy pattern, finished with nautical rope handles for the perfect blend of vintage charm and summer functionality.
Check Crochet Asbury Beach Bag Free Pattern
23. Crochet Tulip Beach Bag

The minimalist beach bag features a sophisticated sage grey texture with braided handles and a leather tassel accent, offering both elegance and practicality for your seaside adventures.
Check Crochet Tulip Beach Bag Free Pattern
24. Crochet Neapolitan Beach Hobo Bag

This delicate mesh crochet tote features a sweet color palette of dusty rose, cream, and mustard yellow, creating an airy design perfect for carrying your summer essentials in romantic style.
Check Crochet Neapolitan Beach Hobo Bag Free Pattern
25. Crochet Sun City Bag

The circular crochet bag combines natural beige tones with playful yellow and white pom-pom tassels, creating a chic, summery accessory that's perfect for both beach days and city strolls.
Check Crochet Sun City Bag Free Pattern
26. Crochet Lotus Bag

The Lotus bag features a serene seafoam green chevron pattern with white accents, creating a gentle wave-like texture that's perfectly sized for carrying beach essentials while adding a fresh, coastal vibe to your summer look.
Check Crochet Lotus Bag Free Pattern
27. Crochet Catalina Beach Bag

The Catalina features vibrant sunset-inspired stripes in coral, orange, brown and cream, adorned with a playful tassel charm and leather strap, making it a perfect companion for warm-weather adventures and beach outings.
Check Crochet Catalina Beach Bag Free Pattern
28. Crochet Gingham Tote Bag

This charming gingham beach tote showcases a fresh spring palette of grass green and cream checks, complete with coordinating straps and a whimsical eyeglass charm, perfect for farmers' markets or seaside adventures.
Check Crochet Gingham Tote Bag Free Pattern
29. Crochet Magnolia Granny Square Bag

This sophisticated granny square beach tote features an elegant pattern of forest green, caramel, and gray flowers on crisp white background, adorned with coordinating tassels for a modern take on traditional crochet.
Check Crochet Magnolia Granny Square Bag Free Pattern
30. Crochet Checker Print Beach Bag

This coastal-inspired beach tote features a classic checkerboard pattern in soothing sage green and cream, crafted with sturdy crochet stitches to create a spacious carryall for your beach day essentials.
Check Crochet Checker Print Beach Bag Free Pattern
31. Crochet Tobago Bag

This tropical-inspired beach bag combines geometric patterns in sunset shades of coral, orange, and emerald with natural cream yarn, featuring delicate eyelet details and wooden bead accents for a breezy, bohemian vibe.
Check Crochet Tobago Bag Free Pattern
32. Crochet Monochrome Beach Bag

The timeless crochet tote features a sophisticated textured stitch in natural cream with contrasting black handles, offering classic elegance for both beachside adventures and everyday outings.
Check Crochet Monochrome Beach Bag Free Pattern
33. Crochet Carnival Beach Bag

The vibrant crochet tote features a festive pattern of red, aqua, and white dots, with matching red handles, bringing a playful retro fairground spirit to your beach adventures.
Check Crochet Carnival Beach Bag Free Pattern
Don't forget to pin it

Our PDF Pattern Sample
Just click the print button on pattern, you can save PDF document or print it.


