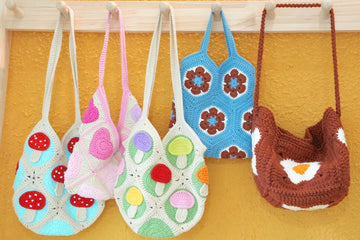
Looking at this enchanting celestial-themed crochet bag, I'm excited to share one of my favorite patterns with you!
This delightful tote features charming granny squares decorated with stars, moons, and suns in a stunning blue and yellow color combination. Perfect for summer outings or as a whimsical everyday bag, it's both practical and eye-catching.
The best part? While it looks intricate, it's actually achievable for intermediate crocheters!
Ready to create your own piece of the sky? I'll guide you through each step with detailed instructions and clear photos. You'll find everything you need in this guide to bring this magical bag to life. Let's get started on this wonderful crochet journey together!
Pin for later
Pin this celestial granny square bag pattern now - trust me, you'll want to create this charming piece the moment you find your perfect yarn colors!

Details About Star Granny Square Bag
Let me share all the magical details you'll need to create your own piece of the starry sky! Each granny square measures approximately 3.7x3.7 inches (9.4x9.4 cm), making it a perfect size to work with. You'll be creating a total of 27 enchanting squares - imagine having 9 twinkling stars, 9 radiant suns, and 9 dreamy crescent moons in your hands!
When assembled, this charming bag measures about 15 inches (38 cm) in width and 13.4 inches (34 cm) in height - roomy enough for your daily essentials while maintaining that adorable look.
For the colors, I'm in love with this royal blue and golden yellow combination - it really captures that magical night-and-day feeling! But feel free to let your creativity shine - try navy blue with silver for a nighttime sky vibe, or perhaps dusty rose with cream for a softer, sunset-inspired look. You could even go bold with purple and gold for a mystical touch!
Remember, the key to making these celestial motifs pop is choosing contrasting colors that complement each other. Whatever colors you choose, make sure the chosen shade forms the background to help your celestial elements truly shine!
Recommended Yarn and Crochet Hooks
For this dreamy celestial bag, I absolutely love using Loopara 5 ply milk cotton yarn - it's my go-to choice for granny square projects! This yarn is perfect because it has just the right balance of softness and structure, plus it comes in the most gorgeous colors. For our star-studded design, I've picked Royal Blue as the main color to create that dreamy night sky background, paired with Golden Yellow for those magical celestial motifs.
Why milk cotton yarn for granny squares? Let me tell you - it's a game-changer! The stitch definition is absolutely incredible, making your stars, suns, and moons pop beautifully. This yarn holds its shape wonderfully and gets softer with each use while maintaining that lovely, defined texture that makes your motifs stand out.
For hooks, I'm using a 3.0mm hook, which creates perfect, tight stitches that give the bag great structure. If you tend to crochet tightly, you might want to size up to 3.5mm, or if you're a loose crocheter, stick with the 3.0mm for best results.
Pro tip: Before you start, make a test square with your chosen yarn and hook - you want those stitches tight enough to hold your belongings safely, but not so tight that your squares become stiff! The joy of creating comes from working with tools that feel right in your hands!
Materials needed for Star Granny Square Bag
- Yarn – Loopara 5ply combed cotton
- Hook – 3.0mm
- Scissors
- Stitch Marker
- Yarn Needle

Abbreviations (US Terms)
- ch - chain
- sc - single crochet
- dc - double crochet
- inc - increase
- sl - slip stitch
- tr - treble crochet
- hdc - half double crochet
- dc2tog - double crochet 2 together
- dc inc - double crochet increase
- hdc inc - half double crochet increase
- sc inc - single crochet increase
Star Granny Square Bag Layout

In this layout, we'll arrange our 27 squares (9 each of stars, suns, and moons) to create a mesmerizing celestial pattern. This strategic placement ensures our design flows beautifully while maintaining the perfect structure for a sturdy, functional bag.
How to Crochet Star Granny Square Bag – Step by Step
Note: The tutorial uses different yarn colors for the crocheting and assembly processes. You can choose whatever color you like. If you’re not crazy about our color palette, I put together two color-changing techniques that I use for all of my projects. Let me show you how to make these color transitions smooth and professional so you can bring your unique, creative vision to life.
How to Crochet a Sun Granny Square (Make 9)

Round 1: Chain 3, make 11 double crochet into the ring, slip stitch into the top of chain-3 to join.

Round 2: Chain 3, double crochet, (double crochet increase) 11 times, slip stitch into the top of chain-3 to join.

Round 3: (Chain 3, double crochet, chain 3), (double crochet 2 together, chain 3) 11 times, slip stitch into the top of chain-3 to join.

Round 4: (Chain 3, double crochet), [3 double crochet, (3 treble crochet, chain 1, 3 treble crochet, 3 double crochet)] 3 times, (3 double crochet), (3 treble crochet, chain 1, 3 treble crochet, double crochet), slip stitch into the top of chain-3 to join.

Round 5: Change color. (Chain 3, treble crochet increase), [3 double crochet, (3 double crochet, chain 1, 3 double crochet), 3 double crochet, 3 double crochet] 3 times, 3 double crochet, (3 double crochet, chain 1, 3 double crochet), 3 double crochet, slip stitch into the top of chain-3 to join.
Fasten off, and weave in ends.
Tips: Keep your tension consistent throughout all 9 squares - they'll need to be the same size for easy joining later. When making the sun rays (treble crochet sections), maintain even spacing for that perfect sunburst effect.
How to Crochet a Star Granny Square (Make 9)

Round 1: Chain 5, then slip stitch into the first chain to form a ring.

Round 2: Chain 3, work 14 double crochet into the ring, slip stitch into the top of the starting chain-3.

Round 3: (Chain 5, single crochet in 2nd chain from hook, half double crochet, double crochet, treble crochet, skip 2, slip stitch) 5 times, slip stitch into the first slip stitch.

Round 4: Change color. Chain 1, work (single crochet, half double crochet, double crochet, treble crochet, treble crochet increase, treble crochet, double crochet, half double crochet) 5 times around, slip stitch into the first single crochet to join.

Round 5: Chain 4, work 2 double crochet, half double crochet, 3 single crochet, half double crochet, double crochet, treble crochet, then work [(treble crochet, chain 2, treble crochet), 2 double crochet, half double crochet, 3 single crochet, half double crochet, double crochet, treble crochet] 3 times, treble crochet, chain 2, slip stitch into the top of starting chain-4.

Round 6: (Chain 3, double crochet, chain 1, 2 double crochet), 11 double crochet, work [(2 double crochet, chain 1, 2 double crochet), 11 double crochet] 3 times, slip stitch into the top of beginning chain-3.
Fasten off, and weave in ends.
Tips: When creating the star points, be extra mindful of your stitch placement. Each point should be evenly spaced around the circle for that perfect star shape. Count your stitches carefully in Round 5 and 6 as this is where your star transforms into a square.
How to Crochet a Moon Granny Square (Make 9)

Round 1: Chain 3, work 17 double crochet into the ring, slip stitch into the top of the starting chain-3.

Round 2: Change color. Chain 1, single crochet, half double crochet increase, (half double crochet, double crochet increase), (double crochet, treble crochet increase), (3 treble crochet), (3 treble crochet), (treble crochet increase, double crochet), (double crochet increase, half double crochet), half double crochet increase, single crochet, slip stitch into the first single crochet.

Round 3: Change color. (Chain 4, chain 2, treble crochet increase), treble crochet, 5 double crochet, treble crochet, (treble crochet increase, chain 2, treble crochet increase), treble crochet, 5 double crochet, treble crochet, (treble crochet increase, chain 2, treble crochet increase), 2 treble crochet, 4 double crochet, treble crochet, (treble crochet increase, chain 2, treble crochet increase), treble crochet, 4 double crochet, treble crochet, treble crochet, slip stitch into the second chain of beginning chain-4.

Round 4: (Chain 3, double crochet, chain 2, double crochet), [11 double crochet, (double crochet, chain 2, double crochet)] 3 times, 10 double crochet, slip stitch into the top of chain-3.

Round 5: (Chain 3, chain 1, double crochet), 13 double crochet, [(double crochet, chain 1, double crochet), 13 double crochet] 3 times, slip stitch into the top of beginning chain-3.
Fasten off, and weave in ends.
Tips: In Round 1, make sure your initial 17 double crochets are evenly spaced in the ring as this creates the perfect foundation for your crescent moon shape. Watch your tension in the final rounds - too tight will make your moon pucker, too loose will make it wavy.
Crochet Star Granny Square Bag Assemble
How to Assemble and Sew Bag Body:

Step 1. Chain, (15 single crochet, single crochet increase) repeat 4 times. Crochet one round according to the pattern diagram. Do this for all 27 squares.

Step 2. Begin placing stitch markers according to the layout.

Step 3. Use the whipstitch method shown in Figure of step 2 to join squares, matching stitches one-to-one. Place the wrong sides together and pick up half a stitch from each side for the whipstitch.
Step 4. For the first stitch, sew multiple times in the same spot to secure. Don't pull the thread too tight to maintain the bag shape.

Step 5. Continue sewing, and matching stitches one-to-one.

Step 6. When connecting granny squares in the middle, sew the last stitch of the first two squares 1-3 times. Begin connecting the next two squares, pulling the loop tight. Similarly, sew the first stitch 1-3 times.
Step 7. Continue sewing, and matching stitches one-to-one.
Step 8. Use the whipstitch method to join the remaining two rows of squares.

Step 9. Horizontal row joining is complete.

Step 10. Next, join the vertical rows of squares using the whipstitch method, following the layout.

Step 11. When joining at the middle intersection, connect all four squares together with an extra round of stitches.
Step 12. Continue sewing, and matching stitches one-to-one.
Step 13. Add extra securing stitches at the end of each row. Cut yarn, leaving a long tail for joining.
Step 14. Complete the remaining joining.

Step 15. Flat assembly of the bag body is complete.

Step 16. Turn the bag body squares, fold the fourth square from right to left in half, fold the first square on the left in half, and secure with stitch markers.

Step 17. Connect the left and right three squares at the bottom with stitch markers, and place stitch markers at the corresponding squares in the middle.

Step 18. Whipstitch following the sewing line shown in the picture.

Step 19. The bag body assembly is complete.

Step 20. Work one round of single crochet around the bag opening.

Step 21. The bag body is finished.
Tips: Always double-check your square placement before sewing. Use stitch markers liberally while assembling to keep everything aligned perfectly, especially during the folding and shaping steps.
How to Sew Bag Strap (Make 2):

Step 1. Chain 6 for braid stitch, double crochet in 5th chain from hook.


Step 2. Chain 3, work 6 half double crochet bobble in adjacent hole, chain, work 6 unfinished front post double crochet next to cluster in 3-chain braid, work off in pairs 6 times.

Step 3. Repeat step 2 until the desired strap length.

Step 4. Sew strap to the bag, securing with multiple stitches.

Tips: Keep track of your strap length as you go. Measure it against your body to find the perfect length for comfortable carrying. Remember both straps need to be identical.
How to Join Granny Squares
While I've used one simple joining method in this pattern, you might find another technique that better suits your style. I'm excited to share my comprehensive guide on 11 Ways to Join Granny Squares with you! I've detailed every method I know and love - each brings its own special touch to your finished piece. Let me help you discover which one works best for you!
How to Weave in Ends Crochet Granny Square
The secret for professional-looking granny squares is all about how you weave in those ends. I'm sharing 3 ways to weave in ends with you! These are techniques I've perfected over years of crocheting and use in all my projects. I'll show you exactly how I secure my ends to make sturdy, polished pieces that last. Trust me, once you master these finishing methods, your granny squares will look absolutely stunning!
Care and Cleaning Instructions
Daily Care Tips
Keep your celestial bag looking magical with gentle daily care! Spot clean any small marks with a damp cloth, and always empty your bag after use to maintain its shape. When not carrying it, stuff it lightly with tissue paper to help preserve those beautiful star, sun, and moon motifs. Remember - a little care each day keeps your bag sparkling!
Washing Methods
When your celestial companion needs refreshing, hand wash is your best friend! Use cool water and mild soap, gently squeezing (never wringing!) to clean. Avoid harsh scrubbing that might disturb those lovely stitches. After washing, reshape while damp and lay flat to dry away from direct sunlight - this helps preserve those gorgeous blue and yellow colors!
Storage Suggestions
Store your bag like the treasure it is! Keep it in a cool, dry place away from direct sunlight to prevent color fading. I recommend stuffing it with acid-free tissue paper to maintain its shape, and storing it flat rather than hanging - this prevents any stretching. For extra protection, you might want to tuck it into a cotton storage bag when not in use. Remember, proper storage means your celestial bag will keep sparkling for years to come!

What’s Next?
Share this enchanting celestial bag pattern with your crafty friends! Whether they're crochet enthusiasts on Instagram, Pinterest lovers searching for their next project, Facebook crafting groups, or Twitter's vibrant crocheter community - spread the magic of handmade creation! Every crocheter deserves a chance to carry a piece of the starry sky.