Dive into the whimsical world of crochet with our adorable Mushroom Granny Square Bag! This charming accessory combines the classic granny square technique with playful mushroom motifs, creating a unique and eye-catching design. Perfect for nature lovers and crochet enthusiasts alike, this bag is sure to brighten up any outfit and spark joy wherever you go.
Ready to embark on this delightful crochet journey? We've got you covered with a comprehensive, step-by-step guide and easy-to-follow pattern. Whether you're a seasoned crocheter or just starting out, you'll find all the details you need to bring this fungi-tastic bag to life. So grab your hooks and yarn, and let's get crafting!
Pin for Later
Pin this pattern now and treat yourself to a fun, mushroom-filled crochet adventure whenever you're ready to add a touch of whimsy to your wardrobe!

Details About Mushroom Granny Square Bag
Each of our charming mushroom squares measures about 4.7 inches, perfect for showcasing those adorable fungi. To create this magical woodland accessory, you'll be crafting and joining 13 of these whimsical squares - it's like assembling a miniature mushroom forest!
Once complete, your bag will measure approximately 9.4 inches wide and 10 inches tall, not including the strap. It's just the right size for carrying your daily essentials or your latest crochet project.
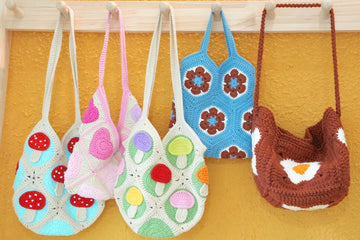
As for the colors, I'm in love with the earthy yet vibrant palette in our sample - it really captures that enchanted forest vibe. But don't be afraid to let your creativity bloom! You could go for a more muted, vintage look with pastels, or embrace your wild side with neon mushroom caps. How about a monochrome bag with different shades of your favorite color? The possibilities are as endless as your imagination!
Remember, this is your unique creation. Choose colors that make your heart sing and reflect your personal style. After all, the best part of crocheting is infusing each stitch with a bit of yourself!
Recommended Yarn and Crochet Hooks
For the yarn for the fabulous Mushroom Granny Square Bag, I'm absolutely smitten with Loopara 5 ply milk cotton yarn for this project, and let me tell you why!
This yarn is a dream to work with - it's soft, durable, and has just the right amount of stretch. Plus, it comes in a rainbow of colors that are perfect for our funky fungi! For our mushroom meadow, I'd suggest grabbing cream for the background, light green for the grass, and a mix of vibrant colors for the mushroom caps (think red, yellow, purple, pink), with beige for the mushroom stems.
For this yarn, I recommend a 3mm hook. It'll give you nice, tight stitches that'll keep your mushrooms perky and your bag sturdy. One of the best things about using this yarn for granny squares? The stitch definition is chef's kiss. Your mushrooms will pop, and every detail will be crystal clear. Plus, cotton yarn means your bag will be washable - perfect for when you inevitably spill your latte on it (we've all been there, right?).
Remember, though, this is your creation! Feel free to experiment with different yarns or colors. The joy of crochet is making something uniquely you. So go wild, have fun, and let's make some magic!
Materials needed for Mushroom Granny Square Bag
- Yarn– Loopara 5ply combed cotton (Green 03, Green 06, Pink 19, Red 24, Yellow 30, Orange 35, Purple 48 and Apricot 50)
- Hook- 3.0mm
- Scissors
- Hot melt adhesive
- Yarn needle
- Stitch marker

Abbreviations (US Terms)
- ch - chain
- sc - single crochet
- hdc - half double crochet
- dc - double crochet
- tr - treble crochet
- sl - slip stitch
- Magic ring
- FLO - front loop only (for the French knots on the mushroom cap)
Mushroom Granny Square Bag Layout

This layout showcases the mushroom granny squares for the bag, arranged in a playful, asymmetrical pattern. It features colorful mushroom motifs on green backgrounds, surrounded by cream borders. This arrangement allows crafters to visualize how the individual squares will come together to form the charming and whimsical mushroom bag, highlighting its unique design and vibrant color scheme.
How to Crochet Mushroom Granny Square Bag – Step by Step
How to Crochet the Mushroom

Round 1: Chain 9. In 2nd chain from hook, work 7 single crochet. In next stitch, work 3 single crochet. Work 6 single crochet. In last stitch, work 2 single crochet. Slip stitch to join.

Round 2: Chain 1 (doesn't count as a stitch). Work 2 single crochet in first stitch. Work 2 half double crochet, 2 double crochet, 2 half double crochet. Work 3 single crochet increases. Work 6 single crochet. Work 2 single crochet increases. Slip stitch to join.

Round 3: Chain 1 (doesn't count as a stitch). Single crochet in first stitch. Half double crochet increase. Work 2 double crochet, 2 treble crochet, 2 double crochet. Half double crochet increase. (Single crochet, single crochet increase) twice. Work 7 single crochet. (Single crochet, single crochet increase) twice. Slip stitch to join.
Tips: Ensure your initial chain in Round 1 isn't too tight to allow for easy stitching. For Round 3, the increases at specific points help perfect the dome shape - be consistent with your stitch placement for a symmetrical cap.
How to Crochet the Stem

Chain 10. In 3rd chain from hook, work 4 half double crochet. Work 3 double crochet. (Treble crochet, 4 double crochet, treble crochet). Work 3 double crochet. Work 3 half double crochet increases. Slip stitch to join.
Tips: For the stem, ensure your initial chain isn't too tight. The varying stitch heights create the stem's shape, so maintain consistent tension.
How to Crochet the Base

Round 1: Start with a magic ring. Chain 3 (counts as first double crochet), work 11 double crochet into the ring. Slip stitch to join.

Round 2: (Chain 3, double crochet), work 11 double crochet increases. Slip stitch to join.

Round 3: Chain 3 (counts as first double crochet), (double crochet increase, double crochet) 11 times, double crochet increase. Slip stitch to join.

Round 4: Chain 3 (counts as first double crochet), (double crochet increase, 2 double crochet) 11 times, double crochet increase, double crochet. Slip stitch to join.

Round 5: Change color. Chain 2 (counts as first half double crochet), [half double crochet, 3 double crochet, treble crochet, (treble crochet, chain 2, treble crochet), 3 double crochet, 2 half double crochet] 3 times, half double crochet, 3 double crochet, treble crochet, (treble crochet, chain 2, treble crochet), 3 double crochet, half double crochet. Slip stitch to join.
Tips: When working on the base, the magic ring in Round 1 should be tight to avoid a hole in the center. In Round 5, the color change adds depth to your work - ensure a smooth transition. Pay attention to stitch placement in Round 5 as it forms the final scalloped edge of your mushroom base.
Crochet Mushroom Granny Square Bag Assemble
How to Assemble the Bag Body

Step 1: Follow the sewing diagram, matching pieces precisely. Place flower pieces back-to-back, picking up half a stitch on the inside of each for a rolled stitch seam.

Step 2: Repeat the first stitch twice. Don't pull the thread too tight to maintain the bag's shape.

Step 3: Continue sewing, matching pieces accordingly.

Step 4: At corner holes, only pick up half a stitch from the first lock stitch side.

Step 5: Continue following the sewing diagram.

Step 6: After completing the first line, cut the thread and start anew.

Step 7: Again, repeat the first stitch twice.

Step 8: Finish sewing all corresponding pieces, then cut the thread.

Step 9: Fold the sewn piece at the blank part to form the basic bag shape.

Step 10: Fold and sew the left and right sides of the bag.

Step 11: Use the same method, matching and picking up half stitches.

Step 12: After sewing both sides, secure the thread multiple times.
How to Assemble Handles

Round 1: Crochet a round of single crochet around the bag opening. Make three single crochets in each corner hole, maintaining stitch count elsewhere.

Round 2: After joining to the first stitch, single crochet without increases or decreases. At the first corner, start the handle from the middle of the three corner stitches. Chain 110 (adjust as needed), then connect to the middle stitch of the next corner's three stitches. Continue single crocheting to the next corner and make the second handle similarly.

Round 3: Single crochet without increases or decreases (including over the handle chains).

Round 4: Single crochet a round on the inner side of the handles without increases or decreases.
How to Join Granny Squares
While I've used one simple joining method in this pattern, you might find another technique that better suits your style. I'm excited to share my comprehensive guide on 11 Ways to Join Granny Squares with you! I've detailed every method I know and love - each brings its own special touch to your finished piece. Let me help you discover which one works best for you!
How to Change Colors in a Granny Square
Are you looking for a different color palette? I totally get it—it’s why I love crochet! If you’re not crazy about our color palette, I put together two color-changing techniques that I use for all of my projects. Let me show you how to make these color transitions smooth and professional so you can bring your unique, creative vision to life.
How to Weave in Ends Crochet Granny Square
The secret for professional-looking granny squares is all about how you weave in those ends. I'm sharing 3 ways to weave in ends with you! These are techniques I've perfected over years of crocheting and use in all my projects. I'll show you exactly how I secure my ends to make sturdy, polished pieces that last. Trust me, once you master these finishing methods, your granny squares will look absolutely stunning!
Care and Cleaning Instructions
Daily Care Tips
Your adorable crochet creation deserves some TLC to keep it looking fresh and fabulous. Give it a gentle brush with a soft-bristled brush every now and then to remove any dust or lint. If you're taking your funghi friend out for a spin, be mindful of rough surfaces that might snag the yarn.
And remember, your bag might be cute, but it's not invincible - avoid overloading it with heavy items that could stretch out the stitches.
Washing Methods
When your mushroom bag needs a spa day, treat it with kid gloves! Always check the yarn label first for specific care instructions.
In general, hand washing is your best bet. Fill a basin with cool water and a dash of mild detergent. Gently submerge your bag and swish it around - no rough scrubbing, please! Rinse thoroughly with cool water until all soap is gone.
Now, here's the crucial part: resist the urge to wring it out. Instead, press out excess water by laying it flat between clean towels. Reshape while damp and let it air dry away from direct sunlight or heat.
Storage Suggestions
When your mushroom bag isn't out turning heads, give it a cozy home! Store it in a cool, dry place away from direct sunlight to prevent fading. If you're not using it for a while, stuff it lightly with acid-free tissue paper to help maintain its shape - think of it as a little mushroom pillow!
Avoid hanging your bag by the straps for long periods, as this can cause stretching. Instead, lay it flat or stand it upright in a drawer or on a shelf.
And here's a quirky tip: toss in a lavender sachet to keep your bag smelling fresh and to ward off any unwanted critters. Your mushroom masterpiece will be ready and waiting for your next outing!

What’s Next?
Hey crochet lovers! Did this Mushroom Granny Square Bag tutorial spark joy? Spread the funghi fun! Share this #CrochetMushroom project on Facebook, Pinterest, Instagram, or Twitter. Your crafty friends will thank you for introducing them to this adorable accessory. Let's grow a forest of mushroom bags together!