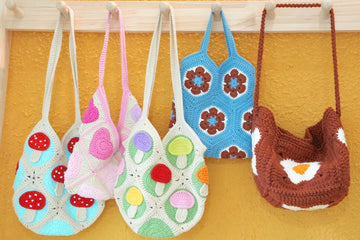
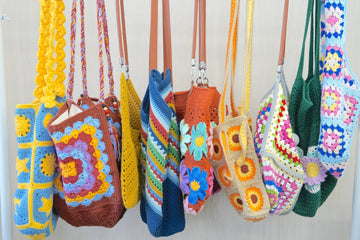
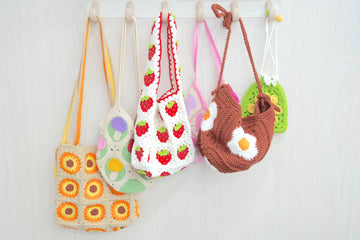
Step into summer with this charming Granny Square Shopping Bag! With its retro-inspired design and candy-colored palette of sky blue, navy, pink, yellow, and cream, this bag brings a playful twist to your everyday errands. Each granny square tells its own color story, creating a joyful patchwork that's sure to brighten your shopping adventures.
Perfect for farmer's market trips or as your daily companion, this roomy tote is both sturdy and stylish. The best part? It folds flat when not in use, making it an eco-friendly alternative to plastic bags.
Ready to crochet your way to sustainable shopping in style? Follow our detailed, step-by-step guide to create this delightful granny square bag!
Pin for Later
Pin this eco-chic granny square bag pattern and add some vintage charm to your sustainable shopping routine!

Details About Granny Square Shopping Bag
Each granny square in this project measures 4-inch - the perfect size to create a bag that's both sturdy and stylish. You'll need 29 squares in total to bring this beauty to life. When assembled, your finished bag will measure approximately 5.5" x 17.7", with a comfortable 9" depth - roomy enough for your farmers' market finds or daily essentials!
For the color palette, I'm absolutely in love with this playful summer combination: sky blue for the borders creates a fresh, airy feel, while navy blue adds structure and sophistication. Pink and yellow bring those perfect pops of joy, and cream softens everything beautifully. Feel free to play with these colors to match your style - maybe try lavender instead of pink, or mint green instead of sky blue. The magic of this pattern is how it transforms with different color combinations!
Remember, each square is its own tiny canvas, so have fun creating different color arrangements within the classic granny square pattern. This is where your bag becomes uniquely yours!
Recommended Yarn and Crochet Hooks
Let me share my favorite yarn choice for this charming market bag! Loopara 5 ply milk cotton yarn brings the perfect balance of structure and softness to your granny squares. The yarn's excellent stitch definition helps create crisp, clean motifs, while its natural sheen adds a lovely dimension to your color transitions. Best of all, it gets softer with each wash while maintaining its shape - exactly what we want in a market bag!
For this playful, summer-inspired design, I recommend a fresh palette that brings joy to your shopping trips. Choose a soft sky blue for your borders and joining - it creates a beautiful backdrop that makes other colors pop. Add navy blue for depth and structure, a sweet pink for cheerful accents, bright yellow for sunny vibes, and cream to soften the overall look. Feel free to adjust these colors to match your style - the pattern works beautifully with any combination that makes your heart happy!
A 3.0mm hook pairs perfectly with this yarn, creating tight, neat stitches that won't stretch out of shape when your bag is full. The practical benefits of this yarn make it ideal for market bags - it's machine washable, incredibly durable, and the colors stay vibrant through multiple washes. Plus, being cotton, it's breathable and eco-friendly, aligning perfectly with the sustainable spirit of reusable shopping bags. Trust me, this yarn will make your market runs both stylish and practical!
Materials needed for Granny Square Shopping Bag
- Yarn– Loopara 5ply combed cotton (Pink 18, Pink 20, Yellow 30, Blue 39, Blue 44 and Apricot 50)
- Hook- 3.0mm
- Scissors
- Yarn needle

Abbreviations (US Terms)
- ch - chain
- dc - double crochet
- sc - single crochet
- sl - slip stitch
- picot - decorative picot edging
- Magic ring
- dec - decrease
- cl - cluster stitch (for corners)
- puff st - puff stitch
Granny Square Shopping Bag Layout

This is the layout diagram for assembling your Granny Square Shopping Bag. The red arrows indicate seaming directions - showing how to connect 12 regular squares for the body, 4 triangle squares for corners, and 13 squares for the edging. This arrangement ensures proper structure and durability.
How to Crochet Granny Square Shopping Bag – Step by Step
Note: The tutorial uses different yarn colors for the crocheting and assembly processes. You can choose whatever color you like. If you’re not crazy about our color palette, I put together two color-changing techniques that I use for all of my projects. Let me show you how to make these color transitions smooth and professional so you can bring your unique, creative vision to life.
How to Crochet the Regular Square (Make 25)

Round 1: Chain 4, slip stitch in first chain to form ring.

Round 2: Chain 3, 2 double crochet, chain 2. (3 double crochet, chain 2) repeat 3 times. Join with slip stitch to top of beginning chain-3.

Round 3: Slip stitch to chain-2 space. In same space, chain 3, 2 double crochet, chain 2, 3 double crochet. In each chain-2 space, (3 double crochet, chain 2, 3 double crochet). Join with slip stitch to top of beginning chain-3.

Round 4: Slip stitch to chain-2 space. In same space, chain 3, 2 double crochet, chain 2, 3 double crochet. Work 3 double crochet in next space between clusters. [(3 double crochet, chain 2, 3 double crochet) in chain-2 space, 3 double crochet in next space] repeat 3 times. Join with slip stitch to top of beginning chain-3.

Round 5: Slip stitch to chain-2 space. In same space, chain 3, 2 double crochet, chain 2, 3 double crochet. Work 3 double crochet in next 2 spaces between clusters. [(3 double crochet, chain 2, 3 double crochet) in chain-2 space, 3 double crochet in next 2 spaces] repeat 3 times. Join with slip stitch to top of beginning chain-3.

Round 6: Slip stitch to chain-2 space. In same space, chain 3, 2 double crochet, chain 2, 3 double crochet. Work 3 double crochet in next 3 spaces between clusters. [(3 double crochet, chain 2, 3 double crochet) in chain-2 space, 3 double crochet in next 3 spaces] repeat 3 times. Join with slip stitch to top of beginning chain-3.

Fasten off, weave in ends.
How to Crochet the Triangle Square (Make 4)

Round 1: Create magic ring. Chain 3 (counts as double crochet), chain 3, work 3 double crochet into ring, chain 3, double crochet. Fasten off.

Round 2: Join new color to first double crochet of previous round. Chain 3 (counts as double crochet), chain 3, 3 double crochet, chain 1. (3 double crochet, chain 3, 3 double crochet), chain 1. (3 double crochet, chain 3, double crochet). Fasten off.

Round 3: Join new color to first double crochet of previous round. Chain 3 (counts as double crochet), chain 3, 3 double crochet, chain 1. Work 3 double crochet, chain 1. (3 double crochet, chain 3, 3 double crochet), chain 1. Work 3 double crochet, chain 1. (3 double crochet, chain 3, double crochet). Fasten off.

Round 4: Join new color to first double crochet of previous round. Chain 3 (counts as double crochet), chain 3, 3 double crochet, chain 1. (3 double crochet, chain 1) repeat twice. (3 double crochet, chain 3, 3 double crochet), chain 1. (3 double crochet, chain 1) repeat twice. (3 double crochet, chain 3, double crochet). Fasten off.

Round 5: Join new color to first double crochet of previous round. Chain 3 (counts as double crochet), chain 3, 3 double crochet, chain 1. (3 double crochet, chain 1) repeat 3 times. (3 double crochet, chain 3, 3 double crochet), chain 1. (3 double crochet, chain 1) repeat 3 times. (3 double crochet, chain 3, double crochet). Fasten off.
Tips: Mark beginning of each round for easy counting. Keep tension even for straight edges. Pay attention to stitch counts on each side.
Crochet Granny Square Shopping Bag Assemble
How to Sew the Bag

Step 1: First, sew the three pieces according to the flat diagram, then assemble them together. Use the inside roll stitch for sewing.

Step 2: Now the three pieces are sewn together. You've completed the main body of the bag.

Step 3: Take out one piece of the bag body and the strap.

Step 4: Align the left sides, with the back sides facing each other, and use the inside roll stitch to sew.

Step 5: Repeat the first stitch once more.

Step 6: Continue sewing, matching each part until you reach the end of the three granny squares.

Step 7: Sew the three granny squares at the bottom of the bag.

Step 8: Sew the three granny squares on the other side of the bag body.

Step 9: Use the same method to sew the other side of the bag.

Step 10: After completing both sides of the bag, finally connect the strap.

Now the bag is completely sewn together.
How to Crochet the Edging

Round 1: Work 3 single crochets in each chain space around the granny square. At the corners, work a single crochet decrease. For all other spaces, work single crochets without increasing or decreasing.

Round 2: At each corner, work a cluster of three single crochets together in one stitch. For all other spaces, work single crochets without increasing or decreasing.

Round 3-4: Repeat the same process on the other side of the piece.
How to Join Granny Squares
While I've used one simple joining method in this pattern, you might find another technique that better suits your style. I'm excited to share my comprehensive guide on 11 Ways to Join Granny Squares with you! I've detailed every method I know and love - each brings its own special touch to your finished piece. Let me help you discover which one works best for you!
How to Weave in Ends Crochet Granny Square
The secret for professional-looking granny squares is all about how you weave in those ends. I'm sharing 3 ways to weave in ends with you! These are techniques I've perfected over years of crocheting and use in all my projects. I'll show you exactly how I secure my ends to make sturdy, polished pieces that last. Trust me, once you master these finishing methods, your granny squares will look absolutely stunning!
Care and Cleaning Instructions
Daily Care Tips
Keep your colorful companion looking fresh between washes by giving it a gentle shake after each use - this helps prevent dust and crumbs from settling into the stitches. If you spot any loose threads, don't pull them! Instead, use a small crochet hook to carefully work them back into the stitches. I also recommend rotating your bag's handles occasionally to distribute wear evenly and maintain its shape.
Washing Methods
When laundry day comes, treat your granny square bag to a gentle handwash with lukewarm water and mild wool detergent. Never wring or twist - instead, gently squeeze out excess water like you're handling delicate flowers. My favorite trick is adding a splash of white vinegar to the final rinse to keep those lovely colors vibrant. Let it air dry flat, reshaping the squares while damp.
Storage Suggestions
When your bag needs a break, store it flat rather than hanging - this prevents the squares from stretching out of shape. If you're storing for a longer period, stuff it lightly with acid-free tissue paper to maintain its structure. Keep it in a cool, dry place away from direct sunlight to prevent fading. For extra protection, I love using a cotton pillowcase as a storage bag - it lets the yarn breathe while keeping dust away!

What’s Next?
Crochet your way to sustainable style! Just finished this colorful granny square shopping bag? Share your eco-friendly creation on Facebook, Pinterest, Instagram, or Twitter! Use #GrannySquareBag to join our crafty community. Whether you're a market shopper or fashion lover, your handmade bag can inspire others. Let's make shopping sustainably stylish!


