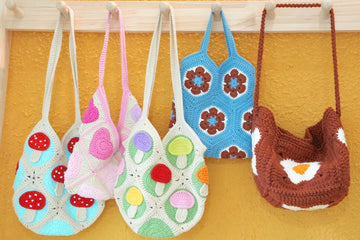
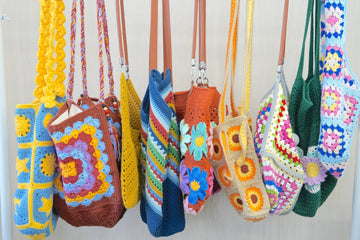
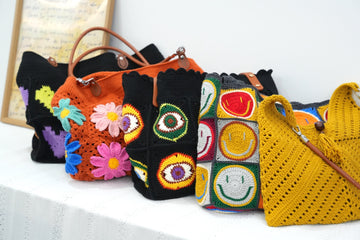
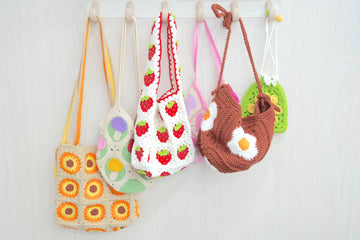
Welcome to my favorite summer project - the Sunburst Granny Square Bag! This radiant design combines vibrant sunburst squares with a classic granny stitch pattern, creating a mesmerizing array of golden rays against a beautiful backdrop.
Each sunburst square tells its own story - some blooming in warm yellows, others in sunset oranges and gentle peach tones - while the intricate center details add that perfect star-like sparkle. The carefully chosen handles complete the look with a touch of modern elegance!
Ready to create your own piece of sunshine? I'll walk you through each step with detailed instructions and clear photos - from crafting individual sunburst squares to joining them into this stunning sun-inspired tote. Whether you're a granny square expert or just starting your crochet journey, this pattern will help you create something truly remarkable. Let's bring some sunshine into your crafting together!
Pin for Later
Save this Sunburst Granny Square Bag pattern for your next crochet adventure – it's the perfect project to brighten up your summer wardrobe!

Details About Sunburst Granny Square Bag
Let me share all the exciting details about this sunny creation!
This Sunburst Granny Square Bag is a perfect blend of size and style. Each sunburst square measures approximately 3.1 inches, creating the perfect canvas for those beautiful ray details to shine. You'll need to make 27 squares in total - trust me, once you get into the rhythm of creating these sunshine beauties, you won't want to stop!
When joined together, your bag will measure about 9.2 inches in height and 9.4 inches in width - the perfect size for carrying your daily essentials while making a stylish statement.
For the color palette, I'm absolutely in love with combining warm golden yellows with soft peachy oranges for the sunburst centers, radiating outward into a crisp white or cream background. You could create sunset vibes with orange centers and yellow rays bordered in coral, or try a desert dream theme using rust orange with golden rays and a beige background. For a fresh summer splash, brighten things up with sunny yellow centers, light orange rays, and pristine white borders.
Remember, the joy of this pattern is making it uniquely yours - so feel free to play with colors that spark joy in your heart!
Recommended Yarn and Crochet Hooks
Let's talk about the perfect materials to bring your sunburst bag to life!
For this project, I highly recommend using Loopara 5 ply milk cotton yarn - it's become my absolute favorite for granny square projects! This yarn works like a dream with its smooth texture and excellent stitch definition, making those sunburst rays pop beautifully. Plus, the milk cotton blend offers just the right balance of durability and softness, perfect for a bag you'll use every day.
For this bag, you'll need a 3.0mm crochet hook, which creates the ideal stitch tension for our squares. This hook size works perfectly with the 5 ply yarn, creating neat, tight stitches that give your bag structure and stability. The smaller hook size also ensures your granny squares won't have gaps or holes - essential for a bag that needs to hold your belongings securely!
For your color selection, I suggest starting with a warm yellow or golden tone for your sunburst centers, followed by peach or light orange for the radiating rays, and finishing with a neutral cream or white for the background. Remember why granny squares are so perfect for bags - they create a sturdy fabric that doesn't stretch out of shape, and the modern sunburst pattern gives this classic technique a fresh, contemporary twist.
Materials needed for Sunburst Granny Square Bag
- Yarn – Loopara 5ply combed cotton
- Hook – 3.0mm
- Scissors
- Stitch marker

Abbreviations (US Terms)
- ch - chain
- dc - double crochet
- sl st - slip stitch
- tr - treble crochet
- bobble st - bobble stitch
- Magic ring
Sunburst Granny Square Bag Layout

This layout demonstrates the assembly pattern for one side of the Sunburst Granny Square Bag, showing how 27 squares should be arranged. Each stitch combination works together to create stunning sunburst motifs at the center of each granny square, which will then be joined to form your radiant bag panels.
How to Crochet Sunburst Granny Square Bag – Step by Step
Note: The tutorial uses different yarn colors for the crocheting and assembly processes. You can choose whatever color you like.
If you’re not crazy about our color palette, I put together two color-changing techniques that I use for all of my projects. Let me show you how to make these color transitions smooth and professional so you can bring your unique, creative vision to life.
How to Crochet the Square (Make 27)

Round 1: Create a magic ring, chain 3, work 15 double crochet into the magic ring, slip stitch to the top of the beginning chain-3.


Round 2: Change color, (chain 3, double crochet, chain 1), (2 double crochet bobble stitch, chain 1) repeat 15 times, slip stitch to the top of the beginning chain-3.

Round 3: Change color, (chain 3, 3 double crochet bobble stitch, chain 2), (4 double crochet bobble stitch, chain 2) repeat 15 times, slip stitch to the top of the beginning chain-3.

Round 4: Change color, (chain 3, 2 double crochet), (3 double crochet) repeat twice, (3 treble crochet, chain 2, 3 treble crochet), [(3 double crochet) repeat 3 times, (3 treble crochet, chain 2, 3 treble crochet)] repeat 3 times, slip stitch to the top of the beginning chain-3. Fasten off and weave in all ends.
Tips: For best stitch definition, keep your tension consistent throughout, especially when working the bobble stitches. Remember to count your stitches after each round - this will ensure your square stays perfectly square and your sunflower stays symmetrical.
Crochet Sunburst Granny Square Bag Assemble
How to Assemble the Bag

Step 1: Align your pieces according to the picture. Place your stitch markers as shown in the diagram.


Step 2: Begin joining following the arrows in the picture. Insert your hook through the center of each corner motif. Match your stitches one by one. Place pattern pieces back to back. Pick up half a stitch from each inside edge. Keep your working yarn below the hook with your left hand.

Step 3: Keep your tension relaxed to maintain bag shape.

Step 4: Match each stitch carefully as you join.

Step 5: Join the remaining two rows of pattern pieces.

Step 6: Complete the horizontal rows of joining. Fasten off and weave in ends.

Step 7: Begin vertical joining according to the picture. Use slip stitch method for joining.

Step 8: Add one lock stitch at vertical pattern intersections.

Step 9: Complete flat assembly of bag pieces.

Step 10: Turn pattern pieces inside out. Fold bag body and align stitch markers. Match bottom markers.

Step 11: Follow joining path shown in the picture.

Step 12: Complete bag body assembly.

Step 13: Work 3 rounds of single crochet around opening.

Step 14: Bag body is now complete.
Tips: When assembling your Sunburst Granny Square Bag, block your squares before joining to ensure even sizing. Take time to align your sunburst centers perfectly, and use stitch markers to hold squares in place while joining for the cleanest result.
How to Crochet the Bag Strap (Make 2)

Step 1: Begin with standing single crochet, keep loose. Chain 2, work into standing stitch.

Step 2: Chain 2, work into space between posts.


Step 3: Repeat for desired length. Work 2 single crochets in each space around.

Step 4: Change color, work one round single crochet. Fasten off, weave in ends.

Step 5: Thread straps through side holes.

Step 6: Tie butterfly bow or preferred knot on sides.
Tips: Work your stitches a bit tighter than usual to prevent stretching with use. This small adjustment will help maintain the perfect strap length over time.
How to Join Granny Squares
While I've used one simple joining method in this pattern, you might find another technique that better suits your style. I'm excited to share my comprehensive guide on 11 Ways to Join Granny Squares with you! I've detailed every method I know and love - each brings its own special touch to your finished piece. Let me help you discover which one works best for you!
How to Weave in Ends Crochet Granny Square
The secret for professional-looking granny squares is all about how you weave in those ends. I'm sharing 3 ways to weave in ends with you! These are techniques I've perfected over years of crocheting and use in all my projects. I'll show you exactly how I secure my ends to make sturdy, polished pieces that last. Trust me, once you master these finishing methods, your granny squares will look absolutely stunning!
Care and Cleaning Instructions
Daily Care Tips
Keep your Sunburst Granny Square Bag looking radiant with a little daily love! Gently brush off any dust or dirt after each use, and avoid overstuffing to maintain its beautiful shape. If you notice any loose threads, trim them carefully - don't pull, as this might affect the stitches.
Washing Methods
When it's time for a refresh, hand wash is your best friend! Use cool water and mild detergent, gently squeezing (never wringing!) to clean. Lay flat to dry in a shaded spot - direct sunlight can fade those gorgeous colors. Avoid the washing machine as it might stress the seams and stitches we've worked so hard to perfect!
Storage Suggestions
Store your sunshine-inspired bag with care! Keep it in a cool, dry place, and stuff it lightly with tissue paper to help maintain its shape when not in use. If you're storing it for a longer period, place it in a cotton bag rather than plastic - this lets your beautiful crochet creation breathe while keeping dust at bay. Remember to store it flat rather than hanging to prevent the straps from stretching!

What’s Next?
Did this sunny project brighten your day? Share the joy with your crafting friends! Pin it on Pinterest, post it on Instagram, tweet about it on Twitter , or spread the sunshine on Facebook. Your creative community will love this cheerful summer bag pattern, and I can't wait to see your beautiful variations!


