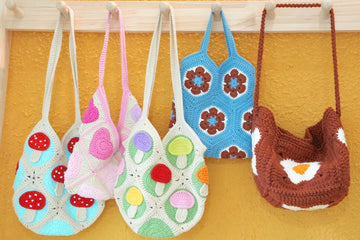
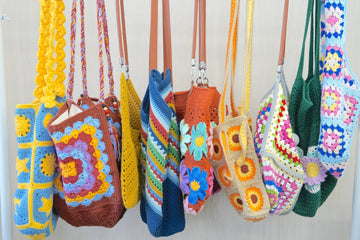
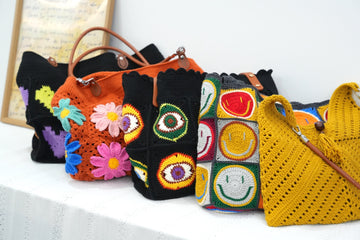
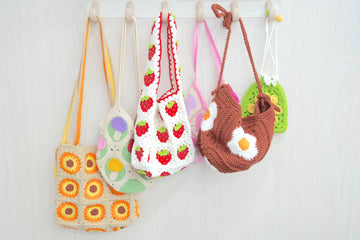
Are you looking to add a touch of handmade charm to your everyday life? Let me introduce you to our Heart Granny Square Tote Bag - a delightful project that combines vintage crafting with modern style!
This eye-catching tote features lovely heart motifs nestled within classic granny squares, creating the perfect blend of romance and practicality. Whether you're out shopping or meeting friends for coffee, this bag carries your essentials while showcasing your crochet talents in the most adorable way.
Want to make one for yourself? I've prepared comprehensive step-by-step instructions with detailed photos to guide you through every stitch of the process. So grab your favorite yarn and hook - let's create something beautiful together!
Pin for Later
Save this heartwarming tote pattern – pin it now to keep these lovely hearts in your crochet inspiration collection!

Details About Heart Granny Square Tote Bag
Let's dive into the delightful details of this Heart Granny Square Tote Bag! Each square measures 4.3 inches - just the perfect size to let those lovely heart motifs shine! You'll need to create 19 of these charming squares and join them together, like piecing together a love-filled puzzle that will soon become your favorite accessory.
When finished, your tote will measure 13.7 inches in height and 16.9 inches in width - roomy enough for all your daily essentials while staying utterly adorable. Now, let's talk about my favorite part - choosing colors! I'm absolutely in love with creating romantic color combinations that make these hearts truly pop.
Picture soft, dreamy backgrounds in cream or ivory, with hearts that steal the show in your favorite hues. Try a vintage-inspired palette with dusty rose hearts against a soft beige backdrop, or go modern with slate blue hearts surrounded by gentle gray stitches. You could even create an enchanting ombré effect by transitioning your heart colors from light to dark!
Remember, this is your unique creation - let it reflect your personality! Whether you're drawn to sweet pastels, bold brights, or sophisticated neutrals, these heart motifs will shine through beautifully. Choose colors that make you smile every time you reach for your tote!
Recommended Yarn and Crochet Hooks
Let me share my favorite yarn recommendations for this sweet Heart Granny Square Tote Bag! For this project, I absolutely love using Loopara 5 ply milk cotton yarn - it's perfect for creating crisp, defined stitches that make those heart motifs really stand out. The cotton blend not only gives your bag a beautiful drape but also ensures it's durable enough for everyday use.
For this pattern, you'll want to grab your 3.0mm crochet hook - this size works beautifully with the 5 ply yarn to create squares that are neither too tight nor too loose. The result? Perfectly shaped granny squares with just the right amount of structure!
Why milk cotton yarn for granny squares? It's a dream to work with! The yarn holds its shape wonderfully, shows off stitch definition beautifully, and gets softer with each wash without losing its form. Plus, it comes in a gorgeous range of colors that will make your heart motifs truly pop.
Remember, the beauty of granny squares is that you can play with different color combinations as you go - it's like painting with yarn, one square at a time!
Materials needed for Heart Granny Square Tote Bag
- Yarn – Loopara 5ply combed cotton
- Hook – 3.0mm
- Scissors
- Yarn Needle
- Stitch marker
- Leather D buckle

Abbreviations (US Terms)
- Magic ring
- ch – chain
- dc – double crochet
- sl – slip stitch
- dc inc – double crochet increase
Heart Granny Square Tote Bag Layout

This layout shows how our heart granny squares are arranged to create a beautiful tote bag. The heart motifs form a delightful pattern against the background color, with each square thoughtfully positioned to create a cohesive and charming design. Let's follow this arrangement to bring your lovely heart-themed tote to life!
How to Crochet Heart Granny Square Tote Bag – Step by Step
Note: The tutorial uses different yarn colors for the crocheting and assembly processes. You can choose whatever color you like.
If you’re not crazy about our color palette, I put together two color-changing techniques that I use for all of my projects. Let me show you how to make these color transitions smooth and professional so you can bring your unique, creative vision to life.


Round 1: Using red yarn, start with a magic ring. Chain 3, make 2 double crochet, chain 2. Repeat (3 double crochet, chain 2) 3 times. Slip stitch into the top of beginning chain-3. Fasten off.


Round 2: Make (chain 3, double crochet, chain 2, double crochet increase), 3 double crochet. Repeat [(double crochet increase, chain 2, double crochet increase), 3 double crochet] 3 times. Slip stitch into the top of beginning chain-3.


Round 3: Make 2 slip stitches, (chain 3, double crochet, chain 2, double crochet increase), 2 double crochet. Change to white yarn, make 3 double crochet. Cut white, change to red yarn, make 2 double crochet. Repeat [(double crochet increase, chain 2, double crochet increase), 7 double crochet] 3 times. Slip stitch into the top of beginning chain-3.


Round 4: Make 2 slip stitches, (chain 3, double crochet, chain 2, double crochet increase), 2 double crochet. Change to white yarn, make 7 double crochet. Change to red yarn, make 2 double crochet, (double crochet increase, chain 2, double crochet increase), 9 double crochet. Change to white yarn, make 2 double crochet, (double crochet increase, chain 2, double crochet increase), 2 double crochet. Change to red yarn, make 7 double crochet. Change to white yarn, make 2 double crochet, (double crochet increase, chain 2, double crochet increase), 2 double crochet. Change to red yarn, make 9 double crochet. Cut red yarn.


Round 5: Change to white yarn, make (chain 3, double crochet, chain 2, double crochet increase), 15 double crochet, (double crochet increase, chain 2, double crochet increase), 2 double crochet. Change to red yarn, make 7 double crochet. Change to white yarn, make 6 double crochet, (double crochet increase, chain 2, double crochet increase), 6 double crochet. Change to red yarn, make 3 double crochet. Change to white yarn, make 6 double crochet, (double crochet increase, chain 2, double crochet increase), 6 double crochet. Change to red yarn, make 7 double crochet. Cut red yarn, change to white yarn, make 2 double crochet, slip stitch into the top of beginning chain-3.


Round 6: Make 2 slip stitches, (chain 3, double crochet, chain 2, double crochet increase), 19 double crochet. Repeat [(double crochet increase, chain 2, double crochet increase), 19 double crochet] 3 times. Slip stitch into the top of beginning chain-3. Fasten off and weave in all ends.
Tips: From Round 3 onwards, use an invisible join when changing colors for a neater finish.
Crochet Heart Granny Square Tote Bag Assemble
How to Seam the Main Body

Step 1: Position the crocheted granny squares according to the image, securing with stitch markers. Follow the image sequence for seaming, using single crochet join.

Step 2: Place two granny squares back-to-back, starting from diagonal braid position. Insert hook, pull up loop, begin matching stitches with single crochet. Keep your tension loose while working to maintain bag shape.


Step 3: Match crossing points with single crochet as shown in image.

Step 4: Continue this pattern to complete remaining sections.

Step 5: Work horizontal and vertical lines with single crochet joins.

Step 6: Show completed effect after two long vertical seams.

Step 7: Fold at center as shown in image, use markers to shape bag.

Step 8: Single crochet around bottom edge, join to first stitch.

Step 9: Seam each edge with single crochet, break yarn after completing.

Step 10: Repeat previous seaming method for horizontal line to complete bag construction.

Step 11: Weave ends to wrong side, securing with multiple passes through nearby stitches.
How to Crochet the Bag Opening

Step 1: Start with a slip knot and chain 3. Work double crochets in sequence, incorporating previous tail ends.

Step 2: Create decrease at granny square joins with one double crochet.

Step 3: Complete round and join to first stitch.

Step 4: Work 5 more rounds of double crochet, matching stitch for stitch.

Step 5: Continue with 7 rounds of single crochet, matching each stitch.

Step 6: Finish opening section, secure yarn and weave in ends.
How to Assemble the Bag Strap

Step 1: Prepare all hardware and materials needed.

Step 2: Position hardware and split matching yarn for attachment.

Step 3: Secure firmly with multiple reinforcement stitches. Knot securely and weave ends through surrounding stitches. Repeat process for remaining hardware pieces.

Step 4: Attach straps to complete the bag.
Tips: Before joining, lay out all your squares first and arrange them to ensure your hearts are facing the right direction. Then use slip stitches to connect them for a seamless finish.
How to Join Granny Squares
While I've used one simple joining method in this pattern, you might find another technique that better suits your style. I'm excited to share my comprehensive guide on 11 Ways to Join Granny Squares with you! I've detailed every method I know and love - each brings its own special touch to your finished piece. Let me help you discover which one works best for you!
How to Weave in Ends Crochet Granny Square
The secret for professional-looking granny squares is all about how you weave in those ends. I'm sharing 3 ways to weave in ends with you! These are techniques I've perfected over years of crocheting and use in all my projects. I'll show you exactly how I secure my ends to make sturdy, polished pieces that last. Trust me, once you master these finishing methods, your granny squares will look absolutely stunning!
Care and Cleaning Instructions
Daily Care Tips
Treat your heart granny square tote with love, and it will keep its charm for years! Gently brush off any dust or debris after each use. When not using your bag, try to avoid hanging it by the straps - this helps maintain its shape and prevents stretching.
Washing Methods
When it's time for cleaning, always hand wash your tote with lukewarm water and mild detergent. Gently squeeze (never wring!) to remove excess water, then reshape while damp. Let it air dry flat in a well-ventilated area, away from direct sunlight to prevent color fading.
Storage Suggestions
Store your lovely tote in a cool, dry place when not in use. I recommend stuffing it lightly with tissue paper to help maintain its shape and prevent creasing. If you're storing it for a longer period, consider placing it in a cotton bag to keep dust away while still allowing the yarn to breathe.

What’s Next?
Did you enjoy making this charming heart tote? Share your creation with the crochet community! Tag me on Instagram, Pinterest, Facebook, or Twitter - I'd love to see your unique color combinations and how you've made this pattern your own. Let's spread the love!


