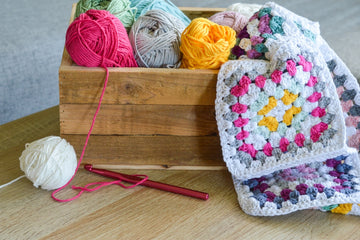
Love making Granny Squares but want to spice them up? You're in for a treat! I'm going to show you two awesome ways to change colors within your Granny Squares. Whether you're a crochet newbie or a seasoned pro, these techniques will take your squares from simple to stunning.
Don't worry if you're more of a visual person – I've got you covered with step-by-step pictures and a helpful video to guide you through each method. Let's get those hooks ready and add some colorful magic to your Granny Squares!
Granny Square Color Change Method 1: Cut-and-Join Method

Step 1: First, crochet one round as normal.

Step 2: We need to change color for the second round.

Step 3: After pulling through the last stitch of the first round, cut the yarn.

Step 4: Take the new color yarn, hold it in your left hand, and use your finger to hold down a short tail at the starting point.

Step 5: Continue crocheting while working over the short tail left at the beginning.

Step 6: Complete this round as normal.

Step 7: The first color change is complete.

Step 8: For the third round, we'll demonstrate the cut and join color change method again.

Step 9: The cut and join method means cutting the yarn when you need to change color, then starting with the new color to crochet.

Step 10: The second color change is complete.
Granny Square Color Change Method 2: Continuous Method

Step 1: Demonstrate on a pre-crocheted piece, crochet until the stitch before the color change is needed.

Step 2: For the next stitch where we need to change color, we'll introduce the new color in the unfinished stitch of the previous color.

Step 3: Take the new color yarn, leave a tail, and hold it down with your finger at the entry point.

Step 4: Pull through a loop with the crochet hook, gently tighten the old color. The first step of the color change is complete.

Step 5: Insert the hook through the stitch, place the old color over the hook, then yarn over with the new color and pull through.

Step 6: For each following stitch, always place the old color over the hook while crocheting.

Step 7: When it's time to change color again, similarly introduce the new color in the unfinished stitch, holding the new yarn in your left hand, and yarn over to pull through.

Step 8: Always remember to keep the old color on top of the hook.

Step 9: On the wrong side of the work, you'll see that all the yarn tails are hidden.

Step 10: Continue demonstrating the continuous color change method.

Step 11: The continuous color change method involves carrying the unused color along as you crochet, bringing it up when needed, until it's no longer needed and can be cut.

Step 12: After completing each round, when joining, also place the carried yarn over the hook as you move to the next round.

Step 13: Demonstration complete.
What’s Next?
Loved these color-changing techniques? Share the crochet magic! Spread the joy on Facebook, show off your colorful creations on Instagram, pin this guide on Pinterest for future projects, or tweet about your Granny Square game-changer on Twitter. Your crafty friends will thank you, and together we'll make the crochet world even more vibrant!


