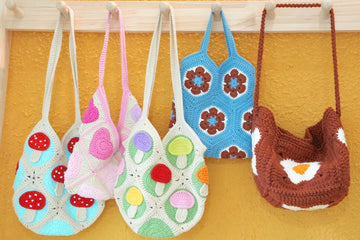
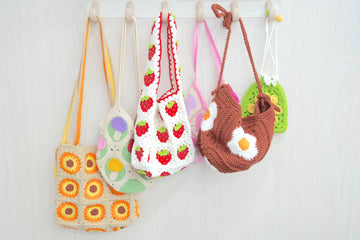
Looking for a charming weekend project that combines vintage charm with modern style? This adorable granny square bag is exactly what you need!
With its sweet flower motif in coral and turquoise, paired with a rustic strap, this little bag adds the perfect handmade touch to any outfit. The best part? It's surprisingly simple to make, even if you're new to crochet.
Ready to create your own? I'll walk you through every step with detailed photos and easy-to-follow instructions. Grab your favorite cotton yarn, and let's get started on this delightful accessory that's sure to become your new favorite conversation starter!
Pin for later
Pin this lovely pattern now - it's the perfect weekend project to add a handmade touch to your spring wardrobe!

Details About Single Granny Square Bag
Ah, let me clarify the details about this charming bag! The design actually requires two identical granny squares - one for the front and one for the back - each measuring approximately 6 inches (15 cm). When joined together, they create a perfectly sized mini bag that's about 6 x 6 inches, ideal for carrying your everyday essentials like your phone, cards, and lipstick.
Speaking of colors, I'm absolutely smitten with this fresh combination of turquoise and coral. For your own version, try to stick to 3-4 colors that work harmoniously together: a main color for the background (like the turquoise here), a contrasting shade for the flower petals (our coral does this beautifully), and perhaps a neutral accent color. You could try sage green with dusty rose, navy with mustard, or even a monochromatic scheme using different shades of your favorite color!
The beauty of making two identical squares is that you'll get into a lovely rhythm with the pattern - once you've mastered the first square, the second one will work up even faster. Plus, this simple two-square construction makes it incredibly beginner-friendly while still looking incredibly polished, especially when paired with that sophisticated strap!
Recommended Yarn and Crochet Hooks
Let me share my absolute favorite materials for creating this charming bag! The star of the show is Loopara 5 ply milk cotton yarn - trust me, it's a dream for granny squares. This yarn creates such beautiful stitch definition that makes every petal of your flower pop, and it has this subtle sheen that gives your finished project an elevated look. Plus, it's durable enough for a bag you'll reach for every day.
For your perfect bag, you'll want to grab a skein each of your main color and contrast color (I used turquoise and coral, but feel free to play with your own color combinations!), plus just a bit of a third color for those flower centers. The joy of granny squares is how versatile they are with colors - you could go bold with rainbow brights, stay subtle with monochromatic shades, or keep it classic with neutrals. It's your creation, so let your personality shine through!
Now, here's a crucial detail about hooks - I used a 4.0mm hook for the flower motif squares because it creates those crisp, well-defined petals we're after, then switched to a 3.5mm hook for the sides to give the bag better structure with slightly tighter stitches.
Speaking of structure, this is why granny squares are perfect for bags - they create a naturally sturdy fabric that holds its shape well, and the openwork pattern adds such a lovely vintage charm while being surprisingly quick to work up!
Materials needed for Single Granny Square Bag
- Yarn – Loopara 5ply combed cotton
- Hook – 3.5mm and 4.0mm
- Stitch Marker
- Scissors
- Yarn Needle
- Button
- Binding

Abbreviations (US Terms)
- ch - chain stitch
- dc - double crochet
- sl - slip stitch
- sc - single crochet
- tr - triple/treble crochet
- puff st - puff stitch
- hdc - half double crochet
- sk - skip stitch
- tr puff st - treble puff stitch
How to Crochet Single Granny Square Bag – Step by Step
Note: The tutorial uses different yarn colors for the crocheting and assembly processes. You can choose whatever color you like. If you’re not crazy about our color palette, I put together two color-changing techniques that I use for all of my projects. Let me show you how to make these color transitions smooth and professional so you can bring your unique, creative vision to life.
How to Crochet an African Flower Granny Square (Make 2)

Round 1: Begin with a magic ring, chain 3, make 15 double crochet into the ring, slip stitch to join in top of starting chain-3.

Round 2: Change color, [chain 3, 1 double crochet, chain 1, 2 double crochet], skip 1, repeat ([2 double crochet, chain 1, 2 double crochet], skip 1) 7 times, slip stitch to join in top of starting chain-3.


Round 3: Slip stitch to start, (chain 3, 6 double crochet), repeat (7 double crochet) 7 more times, slip stitch to join in top of starting chain-3.

Round 4: Change color, repeat (7 single crochet, 1 double crochet) 8 times, slip stitch to join in first single crochet.

Round 5: Change color, repeat [4 single crochet, skip 2, (chain 1, 3-treble puff stitch, chain 3, 3-treble puff stitch, chain 1), skip 2, 4 single crochet, skip 1, half double crochet, skip 1] 4 times, slip stitch to join in first single crochet.

Round 6: Chain 2, 6 half double crochet, (3 double crochet, chain 2, 2 half double crochet), repeat [13 half double crochet, (3 double crochet, chain 2, 2 half double crochet)] 3 times, 7 half double crochet, slip stitch to join in top of starting chain-2. Fasten off and weave in ends.
Tips: Always count your stitches in each round to ensure your flower stays symmetrical. Keep your tension consistent across both squares for a professional finish. Block your granny squares before assembly - this helps them lay flat and match in size.
How to Crochet The Side Panel

Step 1: Begin with double-sided single crochet technique, leaving a long tail. Make a standing stitch. Create double braid stitches.
Step 2: Bring the bottom thread around the hook from the front.

Step 3: Pull the hook through both loops.

Step 4: Repeat to create eight double braid stitches (adjust count for desired width)
Step 5: Make one standing stitch to secure.

Step 6: Insert the hook into back half stitch and braid below. Work one single crochet.

Step 7: Repeat for eight single crochet in total.

Step 8: Add one chain. Turn your work.

Step 9: Pick up back half stitches and braids below. Work single crochet, eight per row.

Step 10: Continue until desired length.

Step 11: Add chain. Turn work.

Step 12: Pick up two loops and one braid below (three strands total). Work eight single crochet.

Step 13: After the final stitch, secure with chain. Fasten off.
Tips: Don't pull your stitches too tight - the side panel needs some flexibility to join with the flower squares. Pay special attention to your turning stitches - they create the edges of your bag
Crochet Single Granny Square Bag Assemble

Step 1. Place stitch markers to mark seaming positions.
Step 2. Thread needle with main bag color.

Step 3. Pick up all stitches from the flower square. Align with the side panel and seam (keep tension loose).
Step 4. Match stitches as you seam.

Step 5. Seam three sides, leaving the top open.

Step 6. Repeat for the second flower square.

Step 7. After three-sided seaming, work two rounds of single crochet around the opening.
How to Assemble the Button:

Step 1. Sew button in the center of one side opening.


Step 2. Create chain loop on the opposite side. Secure with slip stitch and weave in ends.

Tips: Use removable stitch markers liberally to ensure even spacing and alignment. Block your pieces again after seaming if needed to help everything lay flat. Test your button placement by folding the top closed before sewing it permanently.
Care and Cleaning Instructions
Daily Care Tips
Keep your handmade granny square bag looking its best by giving it a little TLC. Brush off any dirt or dust after each use, and be mindful not to overload it - these beauties are meant for your essentials, not your whole life. If you notice any loose threads, trim them carefully rather than pulling them.
Washing Methods
When your bag needs refreshing, hand washing is your best friend. Use cool water and a gentle detergent, soaking for about 15 minutes. Never wring or twist - instead, gently squeeze out excess water using a clean towel. Reshape while damp and let it air dry flat, away from direct sunlight to prevent color fading. Avoid the washing machine - your handmade treasure deserves special treatment!
Storage Suggestions
Store your bag with care to maintain its charming shape. Stuff it lightly with tissue paper to help keep its structure when not in use. Keep it in a cool, dry place away from direct sunlight, and avoid hanging it by the strap for long periods - this can stretch out the strap and distort the bag's shape. If you're storing it for a longer time, consider placing it in a cotton bag to protect it from dust while still allowing the yarn to breathe.
How to Join Granny Squares
Granny squares are perfect for bags, clothing, and blankets. If you're thinking of making one with those squares, I'm excited to share my comprehensive guide on 11 Ways to Join Granny Squares with you! I've detailed every method I know and love - each brings its own special touch to your finished piece. Let me help you discover which one works best for you!
How to Weave in Ends Crochet Granny Square
The secret for professional-looking granny squares is all about how you weave in those ends. I'm sharing 3 ways to weave in ends with you! These are techniques I've perfected over years of crocheting and use in all my projects. I'll show you exactly how I secure my ends to make sturdy, polished pieces that last. Trust me, once you master these finishing methods, your granny squares will look absolutely stunning!

What’s Next?
Did this granny square bag tutorial brighten your day? Share it with your crafty friends on Pinterest, Instagram, Facebook, or Twitter! Every share helps spread the joy of handmade treasures, and I'd love to see your beautiful creations. Don't forget to tag me in your makes!


