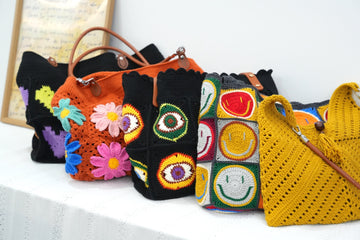
Brighten up your everyday accessories with this cheerful, retro-inspired Smiley Face Granny Square Tote Bag!
I'm absolutely in love with how each colorful square brings a burst of happiness to this practical piece. The playful design combines classic granny square techniques with adorable smiley faces, creating a bag that's sure to make you (and everyone around you) smile.
Ready to spread some joy through crochet? I'll guide you through creating this delightful tote bag with detailed, step-by-step instructions and helpful photos. Whether you're a granny square expert or just getting started, this pattern is a fun way to put your crochet skills to work!
Pin for later
Share the smile and pin this pattern for your next crochet project - trust me, it'll be the happiest bag you've ever made!

Details About Smiley Face Granny Square Tote Bag
Let me walk you through everything you need to know about this joy-spreading tote bag! Each smiley face granny square measures approximately 3.3 inches (8.5 cm) when worked to gauge. The magic of this design comes together with 27 squares in total - I designed it this way so you can have plenty of happy faces without the bag becoming too bulky for everyday use.
When assembled, the finished bag measures about 13 (33 cm) inches wide, and 12.2 (31cm) inches tall - perfect for carrying your daily essentials or even as a fun project bag for your next crochet adventure!
For the color palette, I went with a vibrant retro vibe that really makes those smiles pop! The base of each smile starts with white or cream yarn for the faces, while the backgrounds come alive with a mix of bright, cheerful colors like yellow, red, blue, orange, and green. To tie everything together beautifully, I used charcoal grey for joining the squares and creating sturdy straps.
Feel free to play around with the colors though - that's the beauty of this pattern! You could go pastel for a softer look, or even create a monochromatic version using different shades of your favorite color. Just make sure to keep enough contrast between the face and background colors so those sweet smiles stand out!
Recommended Yarn and Crochet Hooks
For this project, I absolutely love using Loopara 5 ply milk cotton yarn - it's my go-to choice for granny squares because it has the perfect balance of softness and structure. The stitch definition is incredible, which really makes those smiley faces pop, and it holds up beautifully even with daily use. Plus, the cotton blend means your bag will get softer with each wash while maintaining its shape.
When it comes to colors, you'll want to gather white or cream yarn for the smiles, assorted bright colors (yellow, red, blue, orange, and green) for the backgrounds, and a dark grey or charcoal for joining and straps. The contrast between these colors creates that perfect retro-inspired look that makes this bag so special!
I worked this pattern with a 3.0mm crochet hook, which creates nice, tight stitches that give the bag excellent structure. This hook size is perfect for the 5 ply cotton yarn, helping create those crisp, clean granny squares that look so professional when joined together. If you tend to crochet tightly, you might want to go up to a 3.5mm hook - the most important thing is that your squares come out firm but not stiff.
The best part about working with granny squares? They're perfect for on-the-go crafting! You can make them one at a time during your lunch break, while watching TV, or during your commute. Plus, seeing each square completed gives you that instant satisfaction, and they're small enough that you won't get overwhelmed. And if you make a mistake? No worries - you only need to redo one square instead of unraveling a whole project.
Materials needed for Smiley Face Granny Square Tote Bag
- Yarn – Loopara 5ply combed cotton
- Hook – 3.0mm
- Stitch Marker
- Scissors
- Yarn Needle

Abbreviations (US Terms)
- ch - chain
- sl - slip stitch
- sc - single crochet
- dc - double crochet
- hdc - half double crochet
- dc2tog - double crochet 2 together
- inc - increase
Smiley Face Granny Square Tote Bag Layout

This layout helps you visualize how to arrange and join your granny squares to create a well-structured tote bag. Following this T-shaped pattern ensures your bag will have the correct dimensions and proper distribution of squares when folded and seamed into its final form.
How to Crochet Smiley Face Granny Square Tote Bag – Step by Step
Note: The tutorial uses different yarn colors for the crocheting and assembly processes. You can choose whatever color you like.
If you’re not crazy about our color palette, I put together two color-changing techniques that I use for all of my projects. Let me show you how to make these color transitions smooth and professional so you can bring your unique, creative vision to life.
How to Crochet a Smiley Face Granny Square (Make 27)

Round 1: Make a magic ring, chain 3, work 12 double crochet into the ring, slip stitch into the top of chain-3 to join.

Round 2: Chain 3 (counts as double crochet), double crochet in same stitch, 12 double crochet increase, slip stitch into the top of chain-3.

Round 3: Chain 3 (counts as double crochet), double crochet in same stitch, double crochet, (double crochet increase, double crochet) 12 times, slip stitch into the top of chain-3.

Round 4: Chain 3 (counts as double crochet), double crochet, (double crochet increase, 2 double crochet) 12 times, double crochet increase, slip stitch into the top of chain-3.

Round 5: Change color, chain 1, [8 single crochet, 2 half double crochet, (double crochet, chain 2, double crochet), 2 half double crochet] 4 times, slip stitch into the first single crochet to join.

Round 6: Chain 2, 10 half double crochet, (3 half double crochet in the next stitch), [14 half double crochet, (3 half double crochet in the next stitch)] 3 times, 3 half double crochet, slip stitch into the first half double crochet.

Round 7: Work a round of slip stitch in Round 4.

Round 8: Work 19 slip stitch in Round 3, use a yarn needle to embroider eyes on Rounds 1-3.
Tips: Keep your tension consistent throughout each round to ensure your squares stay flat and even. Make sure your smile curve is centered in the square for the best expression. Block your squares if needed to ensure they're all the same size.
Crochet Smiley Face Granny Square Tote Bag Assemble
How to Assemble and Sew the Bag:
Step 1. Prepare 27 granny squares in colors of your choice.

Step 2. Arrange squares according to the Layout and secure them with stitch markers.

Step 3. Following the arrows in the picture for slip stitch joining. Insert hook through loops of corresponding stitches. Keep working yarn under the hook while joining.

Step 4. Avoid pulling the yarn too tight to affect the bag shape.

Step 5. Match stitches carefully as you join.
Step 6. Join the remaining two rows of squares using slip stitch method.

Step 7. Secure the end of the horizontal joining with a slip stitch. Fasten off and weave in ends.

Step 8. Join the vertical rows of squares following the picture. Use slip stitch to transition between vertical joins.

Step 9. Work a slip stitch to transition between vertical joins.

Step 10. Flat assembly of bag is now complete.
Step 11. Flip the bag inside out and secure sides with stitch markers. Secure the bottom of the bag with stitch markers.

Step 12. Join sides following the arrows of the two pictures seam lines.

Step 13. The bag body assembly is now complete.

Step 14. Work 3 rounds of single crochet around the bag opening.

Step 15. The bag body is finished.
Tips: Take a photo of your layout before joining - it's a great reference if squares get mixed up. Keep your joining yarn tension consistent but not too tight - this affects the overall drape of your bag.
How to Sew Bag Strap (Make 2):
Step 1. Leave 30cm tail for sewing before starting.

Step 2. Chain 6, 5 single crochet into 2nd chain from hook.

Step 3. Chain 3, turn, skip 2, (double crochet 2 together, chain, double crochet 2 together), skip 1, double crochet, chain 3, turn.

Step 4. Repeat [(double crochet 2 together, chain, double crochet 2 together), double crochet, chain 3, turn] 54 times.
Step 5. (double crochet 2 together, chain, double crochet 2 together), double crochet.

Step 6. Chain, turn, 5 single crochet.

Step 7. Single crochet along side, 2 single crochet in each chain space. Work loosely.

Step 8. 5 single crochet along the other side.

Step 9. Continue single crochet along side, 2 single crochet in each chain space. Slip stitch to join, leave 30cm tail, fasten off.


Step 10. Sew straps to the bag, reinforcing stitches for strength.

Tips: Count your repeats carefully - uneven straps will affect how your bag hangs. Maintain the same tension on both straps for a professional look. Try to complete both straps in one sitting to maintain consistent gauge.
How to Join Granny Squares
While I've used one simple joining method in this pattern, you might find another technique that better suits your style. I'm excited to share my comprehensive guide on 11 Ways to Join Granny Squares with you! I've detailed every method I know and love - each brings its own special touch to your finished piece. Let me help you discover which one works best for you!
How to Change Colors in a Granny Square
Are you looking for a different color palette? I totally get it—it’s why I love crochet! If you’re not crazy about our color palette, I put together two color-changing techniques that I use for all of my projects. Let me show you how to make these color transitions smooth and professional so you can bring your unique, creative vision to life.
How to Weave in Ends Crochet Granny Square
The secret for professional-looking granny squares is all about how you weave in those ends. I'm sharing 3 ways to weave in ends with you! These are techniques I've perfected over years of crocheting and use in all my projects. I'll show you exactly how I secure my ends to make sturdy, polished pieces that last. Trust me, once you master these finishing methods, your granny squares will look absolutely stunning!
Care and Cleaning Instructions
Daily Care Tips
Keep your happy tote bag looking fresh by giving it a gentle shake after each use to remove any dust or debris. I like to spot-clean any small marks right away using a damp cloth - this prevents stains from setting in. Since we used cotton yarn, the bag is quite durable, but try to avoid overloading it to maintain its cheerful shape!
Washing Methods
When your bag needs a proper clean, hand washing is your best friend! Simply soak it in cool water with a mild detergent, gently squeeze (don't wring or twist!), and rinse thoroughly. I've found that laying it flat to dry on a clean towel works perfectly - reshape the bag while it's damp to maintain those crisp square edges and happy smiles.
Storage Suggestions
To keep those smiley faces grinning, store your bag flat or gently stuffed with tissue paper when not in use. I love using an old pillowcase to protect it from dust - just make sure to avoid hanging it by the straps for long periods as this can cause stretching. And here's my favorite tip: keep it in a well-ventilated space to prevent any musty smells from developing in your cotton yarn!

What’s Next?
Hey crochet friends! If this happy tote bag made you smile, why not spread the joy? Share this pattern on Facebook, Pinterest, Instagram, or Twitter - your crafty friends will love adding this cheerful project to their must-make list! Together, let's make the world a bit brighter, one smiley square at a time!


