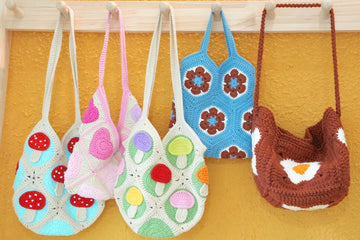
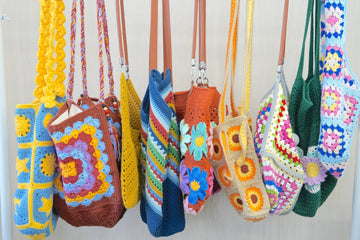
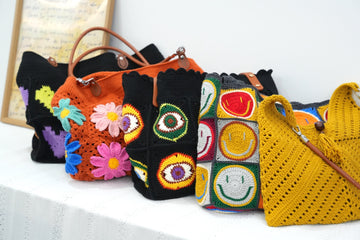
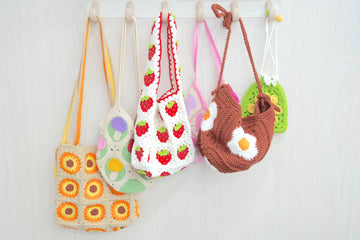
Welcome to this delightful Granny Square Makeup Bag pattern! This fun project combines classic granny square techniques with modern color blocking to create a perfectly-sized zippered pouch. The playful rainbow stripes and charming charm add a touch of whimsy to your everyday essentials, while the sturdy construction keeps your makeup organized in style.
Perfect for both beginners looking to try their first zippered project and experienced crocheters wanting a quick, satisfying make. Plus, it makes an adorable handmade gift for friends who love both makeup and crafty charm!
Ready to create your own colorful companion? Follow our detailed, step-by-step instructions to make this sweet little bag!
Pin for Later
Pin this cheerful makeup bag pattern and add some handmade charm to your daily routine!

Details About Granny Square Makeup Bag
For this playful striped design, we'll be working with straight rows rather than traditional squares, creating a unique textured surface that's both beautiful and durable. The finished bag measures approximately 9" x 6" (22cm x 16cm) - perfect for holding your everyday makeup essentials or crafting supplies. With the flower charm adding an extra 2" when attached, it's both functional and decorative.
For colors, I recommend creating a cheerful rainbow palette using 8-9 different shades. Try this sunny combination: lime green for borders, coral red, turquoise blue, golden yellow, cream, pink, royal blue, and mint green for the stripes. The alternating colors create a beautiful woven effect that makes your bag pop! You can also try pastel combinations for a softer look, or stick to three coordinating colors for a more modern feel.
The front and back panels are worked in one piece, then folded and seamed, making this an excellent project for practicing color changes and post stitches. The textured pattern creates a sturdy fabric that holds its shape well while still being flexible enough to accommodate your items.
Recommended Yarn and Crochet Hooks
Let me share my favorite yarn choice for this adorable makeup bag! Loopara 5 ply milk cotton yarn is absolutely perfect for this project - it creates crisp, clean color changes that make those rainbow stripes really pop, while being sturdy enough to hold your makeup essentials. The yarn's natural sheen adds a lovely polish to your finished bag, and its tight twist helps maintain those beautiful textured stitches.
For this cheerful striped design, I recommend selecting 8-9 colors that make your heart happy! Here's a sunny combination I love: lime green for borders, coral for warmth, turquoise for depth, sunshine yellow for joy, soft cream for balance, candy pink for sweetness, and royal blue for drama. The yarn's consistent texture ensures smooth color transitions while keeping your post stitches defined and beautiful.
A 3.0mm hook works like magic with this yarn for our makeup bag - it creates a tight, sturdy fabric that won't stretch out of shape when filled. What makes this yarn perfect for accessories? Beyond its beautiful stitch definition, it's machine washable (because makeup spills happen!), keeps its shape wonderfully, and the colors stay vibrant even with regular use. Plus, the cotton content means your bag is both durable and gentle on your makeup tools!
Materials needed for Granny Square Shopping Bag
- Yarn– Loopara 5ply combed cotton (Green 01, Green 03, Blue 13, Pink 20, Yellow 28, Yellow 33, Orange 37, Blue 43 and Apricot 50)
- Hook- 3.0mm
- Scissors
- Yarn needle
- Stitch marker
- Zipper

Abbreviations (US Terms)
- ch - chain
- dc - double crochet
- sc - single crochet
- sl - slip stitch
- tr - treble crochet
- FPtr - front post treble crochet
- Front loop only
How to Crochet Granny Square Makeup Bag – Step by Step
Note: The tutorial uses different yarn colors for the crocheting and assembly processes. You can choose whatever color you like. If you’re not crazy about our color palette, I put together two color-changing techniques that I use for all of my projects. Let me show you how to make these color transitions smooth and professional so you can bring your unique, creative vision to life.
How to Crochet the Main Body

Round 1: Chain 28.

Round 2: Chain 3 (counts as first double crochet), work 28 double crochet across. Turn work.

Round 3: Chain 3, work 28 double crochet across. Turn work.

Round 4: Change color. Chain 3, double crochet. Work (front post treble crochet, skip stitch, double crochet, front post treble crochet, skip stitch, double crochet, front post treble crochet, skip stitch, 5 double crochet) repeat 2 times. Work front post treble crochet, skip stitch, double crochet, front post treble crochet, skip stitch, double crochet, front post treble crochet, skip stitch, 2 double crochet. Turn work.

Round 5: Chain 3, work 28 double crochet across. Turn work.

Round 6: Change color. Chain 3, 6 double crochet. Work front post treble crochet, skip stitch, double crochet, front post treble crochet, skip stitch, double crochet, front post treble crochet, skip stitch, 5 double crochet. Work front post treble crochet, skip stitch, double crochet, front post treble crochet, skip stitch, double crochet, front post treble crochet, skip stitch, 7 double crochet. Turn work.

Round 7: Chain 3, work 28 double crochet across. Turn work.

Completing Pattern: Repeat rounds 4-7 three complete times. Then repeat rounds 4-7 two more times. Finally, work rounds 4-5 once more.
Tips: Keep tension consistent for even texture. Count stitches regularly to maintain 28 stitches. Make color changes neat at row beginnings.
Crochet Granny Square Makeup Bag Assemble
How to Assemble and Sew the Bag

Step 1: Start with chain 55 for the first row. Follow the granny square pattern shown in diagram. Repeat rounds 4-5 until you reach your desired length.

Step 2: Fold the piece in half at the center. Begin joining from the bottom. Make a standing stitch, single crochet, then chain. Work (single crochet, chain) pattern to the end of the row.

Step 3: Work one row of double crochets along the opening.

Step 4: Chain 3,Work (single crochet, chain) pattern to the end of the row.

Step 5: Leave 4 stitches on each side for markers.

Step 6: Start sewing zipper from the right marker position. Use back-and-forth stitching method. Keep your stitching line straight all the way to the left marker.
Step 7: Sew the other side using the same method. Remember to keep the zipper open while sewing. Make sure zipper teeth align perfectly.

Step 8: After zipper installation, use slip stitch to join the 4 marker stitches. Secure all corners with slip stitches. Fasten off and weave in ends neatly.
How to Make the Snowflake Pendant

Step 1: Wrap yarn 8 times around index finger. Pull through with hook to create base ring. Work a chain to secure.

Step 2: Work 22 single crochets around the ring.

Step 3: Chain 2. [Work 5 incomplete double crochets. Pull yarn through all loops at once. Insert hook through first thread on left. Single crochet to secure. (Chain 4, single crochet) 3 times. Chain 2] Repeat 6 times. Slip stitch to join.

Step 4: Chain 40 for hanging loop. Thread through side of bag. Secure with slip stitches to snowflake. Weave in all ends.
How to Join Granny Squares
While I've used one simple joining method in this pattern, you might find another technique that better suits your style. I'm excited to share my comprehensive guide on 11 Ways to Join Granny Squares with you! I've detailed every method I know and love - each brings its own special touch to your finished piece. Let me help you discover which one works best for you!
How to Weave in Ends Crochet Granny Square
The secret for professional-looking granny squares is all about how you weave in those ends. I'm sharing 3 ways to weave in ends with you! These are techniques I've perfected over years of crocheting and use in all my projects. I'll show you exactly how I secure my ends to make sturdy, polished pieces that last. Trust me, once you master these finishing methods, your granny squares will look absolutely stunning!
Care and Cleaning Instructions
Daily Care Tips
Think of your makeup bag as a canvas that needs gentle care to keep its artistic stripes bright and beautiful! After each use, turn it inside out and give it a soft tap to remove any loose makeup powder. I love using a clean, soft makeup brush to dust off the textured stitches - it's like giving your bag its own makeup routine! Remember to zip and unzip gently, as rough handling can stress both the zipper and your lovely crochet work.
Washing Methods
When makeup spills happen (and they will!), spot clean immediately with a damp cloth and gentle soap. For monthly deep cleaning, fill your sink with cool water and a drop of gentle shampoo - think of it as a relaxing bath for your bag! Submerge the bag and gently squeeze the soapy water through the stitches. Avoid scrubbing, which can disturb those beautiful textured stripes. Rinse with cool water, press gently between clean towels to remove excess water, and reshape while damp.
Storage Suggestions
Before tucking your bag away each night, check that all your makeup items are tightly closed (no one wants a surprise lipstick leak!). Store it lying flat in your drawer rather than standing up - this helps maintain its shape and prevents gravity from pulling on your careful stitchwork. If you're switching bags for a while, stuff it with soft tissue paper, like tucking your bag in for a cozy nap. Keep your flower charm perky by storing it flat rather than squished at the bottom of a drawer.

What’s Next?
Keep your makeup in style! Just finished this adorable rainbow-striped makeup bag? Share your colorful creation on Facebook, Pinterest, Instagram, or Twitter! Use #CrochetMakeupBag to join our crafty community. Whether you're a makeup lover or crochet enthusiast, your handmade organization can inspire others. Let's make social media more beautiful!


