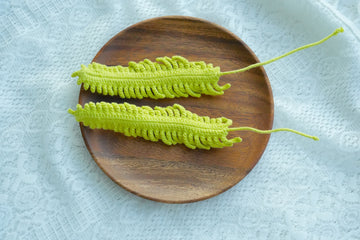
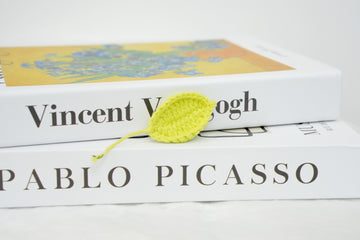
Welcome to my cozy corner of the crochet world! Today, I'm thrilled to share with you how to create a delicate fern leaf using just yarn and a hook. Inspired by nature walks in my local woods, this pattern captures the intricate beauty of ferns.
Don't worry if you're new to crochet – this project is perfect for beginners! With basic stitches and a bit of patience, you'll have your own leafy creation in about an hour.
Did you know ferns have been around for over 360 million years? Now you can bring a touch of this ancient plant into your home with your very own crocheted version. Let's get started!
Pin for Later
Pin this pattern and let's bring a bit of nature's elegance into your crochet projects!

Details & Usage
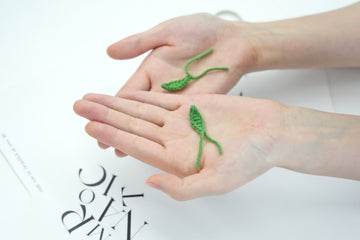
This charming crocheted leaf pattern creates a single leaf that's both versatile and eye-catching. While the exact size can vary based on your tension and yarn choice, you can expect a leaf approximately 6-7 inches long and 1-2 inches wide at its fullest point. This medium size makes it perfect for a variety of creative uses.
I absolutely adore how these leaves can breathe life into any space! In my home, I love scattering them on tables or mantels for a touch of whimsy, especially during autumn.
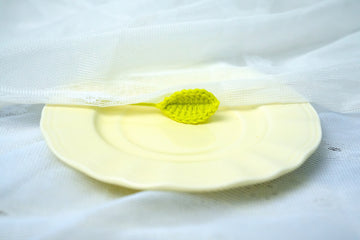
They're my go-to for crafting projects too - I've woven them into wreaths and garlands for a fresh, organic look that always gets compliments. On lazy Sundays, I use them as unique coasters for my tea mug or as a charming bookmark.
I've even surprised friends by stitching them onto bags or hats as quirky appliques. For my niece's school project, we used them as tactile aids for teaching botany - who knew crochet could be so educational?
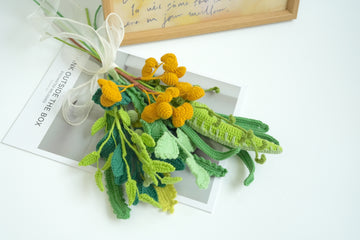
And don't get me started on how perfect they are for nature-inspired costumes or as gift toppers. My personal favorite? Adding them to floral arrangements for a handmade touch that lasts far longer than real leaves.
The possibilities are truly endless with these little green wonders!
Materials needed for
- Yarn – Loopara 4ply combed cotton (Green 13)
- Hook – 2.0mm
- Iron Wire – 0.6mm diameter
- Hot Melt Adhesive
- Scissors
- Stitch Marker

Abbreviations (US Terms)
- Ch – Chain
- Sc – Single crochet
- Sl – Slip stitch
Crochet Fern Leaf pattern

Round 1: Chain 51, add wire, make 49 single crochet in 2nd chain from hook, 3 single crochet in next stitch, 49 single crochet, slip stitch to join, chain 1.
Tips: Ensure your foundation chain is the correct length for your desired leaf size.Take care to maintain even tension throughout for a uniform leaf appearance.

Round 2: Work in pairs (25 pairs + 1 tip):
- Make 6 pairs: (single crochet, chain 10, 9 slip stitches back along chain, single crochet)
- Make 2 pairs: (single crochet, chain 9, 8 slip stitches back along chain, single crochet)
- Make 5 pairs: (single crochet, chain 8, 7 slip stitches back along chain, single crochet)
- Make 1 pair: (single crochet, chain 7, 6 slip stitches back along chain, single crochet)
- Make 4 pairs: (single crochet, chain 6, 5 slip stitches back along chain, single crochet)
- Make 3 pairs: (single crochet, chain 5, 4 slip stitches back along chain, single crochet)
- Make 2 pairs: (single crochet, chain 4, 3 slip stitches back along chain, single crochet)
- Make 2 pairs: (single crochet, chain 3, 2 slip stitches back along chain, single crochet)
For the tip:
- Make 1 (single crochet, chain 4, 3 slip stitches back along chain, single crochet)
- Make 2 pairs: (single crochet, chain 3, 2 slip stitches back along chain, single crochet)
- Make 2 pairs: (single crochet, chain 4, 3 slip stitches back along chain, single crochet)
- Make 3 pairs: (single crochet, chain 5, 4 slip stitches back along chain, single crochet)
- Make 4 pairs: (single crochet, chain 6, 5 slip stitches back along chain, single crochet)
- Make 1 pair: (single crochet, chain 7, 6 slip stitches back along chain, single crochet)
- Make 5 pairs: (single crochet, chain 8, 7 slip stitches back along chain, single crochet)
- Make 2 pairs: (single crochet, chain 9, 8 slip stitches back along chain, single crochet)
- Make 6 pairs: (single crochet, chain 10, 9 slip stitches back along chain, single crochet)
- Slip stitch to join
Tips: Pay close attention to the number of pairs for each stitch combination. The varying lengths of chains create the fern leaf's distinctive shape. Use stitch markers to keep track of your progress, especially at the beginning and end of each section. Maintain consistent tension throughout to ensure your leaf looks even and symmetrical.
Assemble Your Fern Leaf

Step 1: Use the reserved long tail to wrap around the leaf stem to finish.

Step 2: Display your completed fern leaf.
Tip: You can wrap the wire around the bottom part several extra times.
Variations
Let's get creative with our fern leaves! I love playing around with different shapes to make each leaf unique. Sometimes I go for cute, chubby little leaves that remind me of baby ferns, while other times I craft long, elegant ones that look oh-so-sophisticated. My personal favorite? Wavy-edged leaves that add a touch of whimsy. And when I'm feeling romantic, I even make heart-shaped ones – they're adorable!
But why stop at shapes? I'm all about making these leaves pop with fun embellishments. I'll often weave in some sparkly thread for a bit of magic, or sew tiny beads along the edges when I want that extra touch of luxury. On crafty days, I break out the fabric paint to create delicate veins or speckles.
And for special projects, I love adding itty-bitty crocheted flowers or butterflies – it's like creating a whole miniature garden! Oh, and if you haven't tried using bouclé yarn, you must – it gives the leaves this incredible, fuzzy texture that's simply irresistible. The possibilities are endless, and that's what makes this project so exciting!
What's Next?
Ready to transform your crochet into a lush fern paradise? Share this guide with your crafty friends! Whether you're on Facebook, Pinterest, Instagram, or Twitter, spread the love for unique, handmade fern leaves. Let's inspire a crochet revolution, one leaf at a time!


