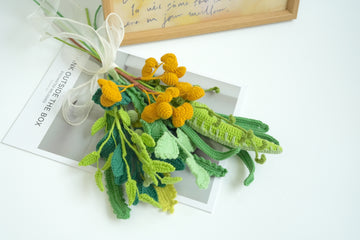
Welcome to the world of crocheted botanicals! Today, we're diving into the art of creating a eucalyptus leaf – those elegant, silvery-green wonders that add a touch of Australian charm to any space. Inspired by the graceful sway of eucalyptus branches in the breeze, this pattern will help you craft realistic leaves that look fresh-picked.
This project is perfect for beginner to intermediate crocheters looking to expand their skills. You'll be working in rows, shaping the leaf's distinct oval form, and adding texture for that authentic eucalyptus look. You can whip up a single leaf in about 30-45 minutes, making it a quick and satisfying project.
Did you know that eucalyptus leaves are packed with essential oils, giving them that refreshing, minty aroma? While our crocheted version won't clear your sinuses, it will certainly clear away any craft-time blues! Plus, unlike real eucalyptus, these leaves are pet-safe and won't dry out.
So grab your hook, and let's create some evergreen magic that will last forever. Your home decor is about to get a dose of down-under charm!
Pin for later

Save this pattern for your next project - you'll want these lifelike eucalyptus leaves adding a touch of Aussie charm to your home soon!
Eucalyptus Leaf Details & Usage
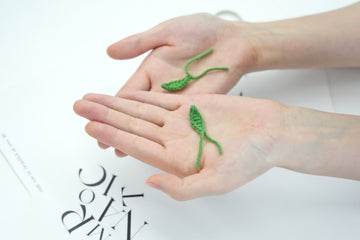
The crocheted eucalyptus leaf typically measures about 9-10 inches (24-25 cm) in length and 1-1.5 inches (2.5-3.8 cm) at its widest point, though size can vary depending on your yarn and hook choice.
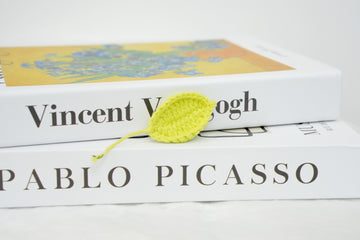
These versatile leaves can be used in numerous ways: add them to wreaths or garlands for a fresh, modern look; incorporate them into bouquets or floral arrangements for long-lasting greenery; use as appliques on bags, hats, or clothing for a natural accent. They make charming bookmarks or gift tags, and can be strung together to create unique curtain tiebacks.
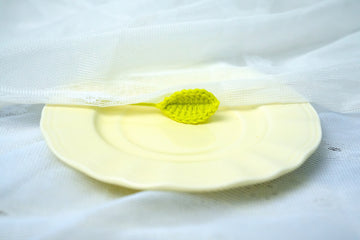
For home decor, scatter them on tables as part of a centerpiece, or attach them to napkin rings for an elegant table setting. Eucalyptus leaves are also perfect for creating realistic-looking plant displays in areas where live plants might struggle, adding a touch of nature to any space without the need for watering or sunlight.
Materials needed for
- Yarn – Loopara 4ply combed cotton (Green 10)
- Hook – 2.0mm
- Floral Stem Wire – 30mm diameter
- Iron Wire – 2mm
- Hot Melt Adhesive
- Stitch Marker
- Scissors

Abbreviations (US Terms)
- ch - chain
- sc - single crochet
- hdc - half double crochet
- dc - double crochet
- sl - slip stitch
- inc - increase (work 2 stitches in same stitch)
Crochet Eucalyptus Leaf Pattern
How to Crochet Leaf A (Make 2)

Round 1: Start with a magic ring. Chain 1. Work 3 single crochets into the magic ring. Slip stitch to join the round. Chain 2 to prepare for the next round.

Round 2: Work 3 single crochets. Slip stitch to join the round. Fasten off, leaving a long tail for attaching the leaf later.
Repeat this process to make a second leaf A.
Tips: When making multiple leaves, try to maintain consistent tension throughout your crochet work. This ensures that all your leaf A pieces will be the same size, creating a more uniform and professional look in your final eucalyptus branch.
How to Crochet Leaf B (Make 3)

Round 1: Start with a magic ring. Chain 1. Work 6 single crochets into the magic ring. Slip stitch to join the round. Chain 1 to prepare for the next round.

Round 2: Work 6 single crochet increases around the circle. Slip stitch to join the round. Fasten off, leaving a long tail for attaching the leaf later.
Repeat this process to make a total of three leaf B pieces.
Tips: When working the increases in Round 2, distribute them evenly around the circle to maintain a smooth, round shape. This will give your leaf B a nice, full appearance. Remember to keep your tension consistent across all three leaf B pieces to ensure they are uniform in size.
How to Crochet Leaf C (Make 3)

Round 1: Start with a magic ring. Chain 1. Work 7 single crochets into the magic ring. Slip stitch to join the round. Chain 1 to prepare for the next round.

Round 2: Work 7 single crochet increases. Slip stitch to join the round.
Repeat this process to make a total of three leaf C pieces.
Tips: As you work on leaf C, focus on maintaining an even tension, especially during the increases in Round 2. This will ensure that your leaf has a smooth, rounded edge without any puckering.
How to Crochet Leaf D (Make 2)

Round 1: Start with a magic ring. Chain 1. Work 7 single crochets into the magic ring. Slip stitch to join the round. Chain 1 to prepare for the next round.

Round 2: Work (single crochet, half double crochet), 2 half double crochet increases, (half double crochet, double crochet, half double crochet), 2 half double crochet increases, (half double crochet, single crochet). Slip stitch to join the round. Fasten off, leaving a long tail for attaching the leaf later.
Repeat this process to make a total of two leaf D pieces.
Tips: When crocheting the leaves, it's crucial to maintain consistent tension throughout the process, especially when making multiple leaves of the same type. This consistency in tension ensures that all your leaf D pieces will be the same size. Pay particular attention to your tension during the increases and when switching between different stitches in Round 2. By keeping your tension even, you'll create uniform leaves that will contribute to a more professional and balanced look in your final eucalyptus sprig.
How to Crochet Leaf E (Make 2)

Round 1: Start with a magic ring. Chain 1. Work 8 single crochets into the magic ring. Slip stitch to join the round. Chain 1 to prepare for the next round.

Round 2: Work (single crochet, half double crochet). Then, work (3 double crochets) three times. Chain 2 to create the leaf tip. Work (3 double crochets) three more times. Finish with (half double crochet, single crochet). Slip stitch to join the round.
Repeat this process to make a total of two leaf E pieces.
Tips: When crocheting these leaves, it's essential to maintain consistent tension throughout the entire process, especially when making multiple leaves of the same type. This consistency in tension ensures that both of your leaf E pieces will be the same size.
Crochet Eucalyptus Leaf Assemble

Step 1: Add thin wire to the base of all leaves except leaf A. Leave leaf A without wire to maintain its softness and flexibility.


Step 2: Thread the tip of the floral stem wire through the base of both leaf A pieces. Using yarn that matches the leaf color, begin wrapping the wire to secure the leaves and create the stem. As you continue wrapping, gradually add leaves B, C, D, and E in sequence. Adjust the positioning of the leaves as you go. Once all leaves are attached, continue wrapping to the end of the stem. Secure the final wrap with a small amount of glue.
Tips: When adding each leaf, try to vary their angles and positions slightly to mimic the natural growth pattern of eucalyptus. This will give your sprig a more realistic and organic appearance. Remember to wrap the stem tightly but carefully to avoid damaging the leaf bases. The key to a professional-looking result is patience and attention to detail during this final assembly process.
Variations
You can get creative with your eucalyptus leaves by experimenting with different shapes to represent various species.
Try elongating the leaves for Blue Gum, or make them rounder for Silver Dollar eucalyptus. You could create pointed leaves for Lemon-scented Gum, or even try a heart-shaped variation for juvenile E. perriniana leaves. The possibilities are endless – just adjust your increases, decreases, and overall shape to match the eucalyptus type you're aiming for.
To add an extra touch of realism, consider incorporating some subtle embellishments. You might use a lighter shade of yarn to add veins with surface crochet, or work with a metallic thread for that signature silvery eucalyptus sheen. Tiny bobble stitches can mimic oil glands, while front and back post stitches can create subtle texture.
Don't be afraid to play with color gradients too – nature rarely sticks to just one shade of green! Remember, the beauty of eucalyptus lies in its subtle variations, so feel free to make each leaf unique.
What's Next?
Eucalyptus lovers and crochet enthusiasts, unite! Just finished your Eucalyptus Leaf project? It's time to let your creation bloom online! Snap a photo and share it on Facebook, Pinterest, Instagram, or Twitter with #CrochetEucalyptusLeaf.
Whether you've made a single leaf or a whole bouquet, your work could inspire others to try this aromatic-inspired pattern. Show off your unique color choices, creative uses, or how you've incorporated these leaves into your home decor. Let's turn social media into a virtual eucalyptus forest!
Your post might be the fresh breeze someone needs to start their own leafy adventure. Together, we can spread the calming joy of crochet, one eucalyptus leaf at a time. Ready to make your creation go viral?


