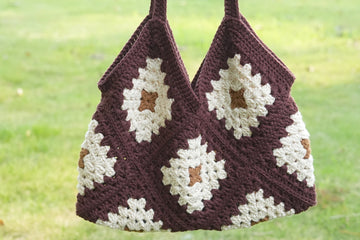
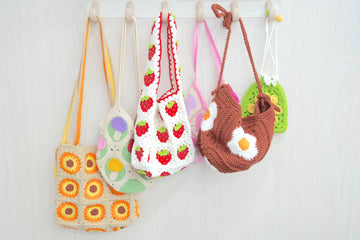
Get ready to craft your way to boho chic with our Granny Square Shoulder Bag! This adorable accessory combines classic crochet techniques with a modern twist, creating a bag that's as stylish as it is functional. The cozy granny squares in warm, earthy tones give it a vintage vibe, while the sleek design keeps it totally on-trend.
Ready to hook up some handmade magic? I've got your back with easy-to-follow, step-by-step instructions and clear diagrams. Whether you're a crochet newbie or a seasoned pro, you'll be strutting your stuff with this unique bag in no time. Let's grab those hooks and make something fabulous together!
Pin for Later
Stitch your way to stylish with this granny square bag - pin now and crochet yourself a slice of handmade heaven whenever you're ready!

Details About Granny Square Shoulder Bag
Each of our charming granny squares measures about 6 inches, perfect for showcasing those beautiful stitches. To create this boho beauty, you'll be crafting and joining 10 of these little lovelies - it's like putting together a miniature crochet quilt!
Once complete, your bag will measure approximately 12 inches wide and 9 inches tall, not including the strap. It's just the right size for carrying your daily essentials or your latest crochet project.
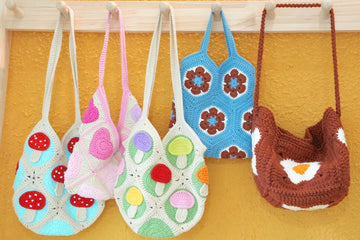
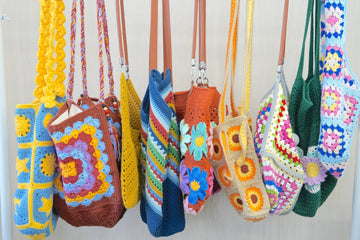
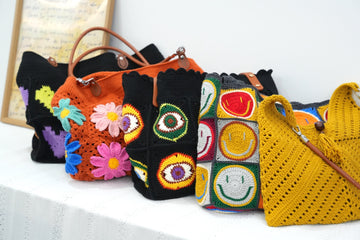
Now, let's talk colors! I'm absolutely smitten with the earthy palette in our sample - it really captures that vintage, handmade vibe. But don't be afraid to let your creativity run wild! You could go for a cool monochrome look with shades of gray, or embrace your bold side with a rainbow of bright colors. How about a pastel dream in soft pinks and blues? The possibilities are as endless as your yarn stash!
Remember, this is your unique creation. Choose colors that make your heart sing and reflect your personal style. After all, the best part of crochet is infusing each stitch with a bit of yourself!
Recommended Yarn and Crochet Hooks
Picture this: you're strolling through a farmer's market, your handmade bag swinging at your side, filled with fresh flowers and artisanal bread. Sounds dreamy, right? Let's make it happen with some yarn magic!
For this project, I'm crushing on Loopara 5 ply milk cotton yarn. It's not just yarn; it's like butter for your hook – smooth, soft, and oh-so-satisfying to work with. Plus, it's tough enough to handle whatever adventures you throw at it.
Color-wise, why not go bold? I'm thinking a rich plum for the main color, with pops of mustard yellow and sage green. It's like a walking autumn landscape! But hey, if that's not your jam, how about a cool coastal vibe with shades of blue and sandy beige?
Grab a 3mm hook for this yarn – it's the Goldilocks of hook sizes for this project. Not too tight, not too loose, just right for creating squares that hold their shape and show off every lovely stitch.
Materials needed for Granny Square Shoulder Bag
- Yarn– Loopara 5ply combed cotton (Apricot 50, Brown 53 and Brown 55)
- Hook- 3.0mm
- Scissors
- Yarn needle
- Stitch marker

Abbreviations (US Terms)
- ch - chain
- sc - single crochet
- dc - double crochet
- hdc - half double crochet
- sl - slip stitch
- FPtr - front post treble crochet
- FPtr2tog - front post treble crochet 2 together
Granny Square Shoulder Bag Layout

This layout showcases the arrangement of granny squares for the shoulder bag. It demonstrates how individual squares are joined to form the bag's structure. The red arrow indicates the direction of assembly, guiding crafters on how to connect the squares to create the bag's shape. This visual guide helps ensure proper placement and construction of the finished product.
How to Crochet the Granny Square – Step by Step

Round 1: Chain 4. Slip stitch in the first chain to form a ring.

Round 2: Chain 3 (counts as first double crochet), 2 double crochet, chain 2 in the ring. (3 double crochet, chain 2) 3 times in the ring. Slip stitch to join in top of beginning chain-3.

Round 3: Slip stitch to chain-2 space. Chain 3 (counts as first double crochet), 2 double crochet, chain 2, 3 double crochet in same space. (3 double crochet, chain 2, 3 double crochet) in each chain-2 space around. Slip stitch to join in top of beginning chain-3.

Round 4: Slip stitch to chain-2 space. Chain 3 (counts as first double crochet), 2 double crochet, chain 2, 3 double crochet in same space. 3 double crochet in next space between clusters. [(3 double crochet, chain 2, 3 double crochet) in chain-2 space, 3 double crochet in next space] 3 times. Slip stitch to join in top of beginning chain-3.

Round 5: Slip stitch to chain-2 space. Chain 3 (counts as first double crochet), 2 double crochet, chain 2, 3 double crochet in same space. (3 double crochet in next 2 spaces between clusters). [(3 double crochet, chain 2, 3 double crochet) in chain-2 space, 3 double crochet in next 2 spaces] 3 times. Slip stitch to join in top of beginning chain-3.

Round 6: Slip stitch to chain-2 space. Chain 3 (counts as first double crochet), 2 double crochet, chain 2, 3 double crochet in same space. (3 double crochet in next 3 spaces between clusters). [(3 double crochet, chain 2, 3 double crochet) in chain-2 space, 3 double crochet in next 3 spaces] 3 times. Slip stitch to join in top of beginning chain-3.

Round 7: Slip stitch to chain-2 space. Chain 3 (counts as first double crochet), 2 double crochet, chain 2, 3 double crochet in same space. (3 double crochet in next 4 spaces between clusters). [(3 double crochet, chain 2, 3 double crochet) in chain-2 space, 3 double crochet in next 4 spaces] 3 times. Slip stitch to join in top of beginning chain-3.
Tips: Maintain consistent tension throughout for a flat square. Use stitch markers in corner spaces to keep track of rounds. The chain-2 corners allow the square to lie flat as it grows.
Crochet Granny Square Shoulder Bag Assemble
How to Sewing the Bag

Sew according to the instruction diagram, matching pieces exactly.

Step 1. Place flower pieces back-to-back.

Step 2. Pick up half stitches from the inside for slip stitch seaming. Keep the thread underneath the flower pieces throughout.

Step 3. Continue matching and sewing the pieces together. When reaching corner holes, only pick up half stitches from one side of the first lock stitch.

Step 4. Leave the top two sides of the bag unsewn.

Step 5. At the end, fasten off at a lock stitch and weave in the ends several times to hide them.
How to Make the Edging

Round 1: Work 20 single crochet along the edge. (3 single crochet in next stitch, 19 single crochet, 1 single crochet, 19 single crochet) 3 times. 3 single crochet in next stitch, 19 single crochet. Slip stitch to join.

Round 2: Chain 3 (counts as first double crochet). Work 20 double crochet. (3 double crochet in next stitch, 41 double crochet) 3 times. 3 double crochet in next stitch, 20 double crochet. Slip stitch to join.
Tips: This edging adds structure to your bag, so work firmly but not too tightly. Count your stitches regularly to ensure accuracy.
How to Make the Strap (Make 2)

Work half double crochet increase in 3rd chain from hook. Work 108 half double crochets. Work 3 half double crochets in next stitch. Work 109 half double crochets. Slip stitch to join.
Leave 30cm (12 in) tail for sewing.
How to Attach the straps

Step 1. Sew the straps to the top of the bag body.

Step 2. Secure the thread at the end.

Step 3. Weave in all ends to finish.
Care and Cleaning Instructions
Daily Care Tips
Your granny square shoulder bag isn't just an accessory; it's a handcrafted piece of art!
Keep it looking fresh by giving it a gentle brush with a soft-bristled brush every few wears. This removes any surface dust or lint, keeping those stitches crisp and clear.
When you're out and about, be mindful of rough surfaces that might snag the yarn. And remember, while your bag is sturdy, it's not invincible – avoid overloading it with heavy items that could stretch out the stitches. A little mindfulness goes a long way in preserving your crochet creation!
Washing Methods
When your granny square bag needs a refresh, it's time for a gentle cleanse. Fill a basin with cool water and add a small amount of mild, wool-safe detergent. Submerge your bag and gently squeeze the soapy water through the fibers – no wringing or twisting, please! After a few minutes, rinse thoroughly with cool water until all soap is gone.
Here's the crucial part: resist the urge to hang it up to dry. Instead, lay it flat on a clean towel, gently reshape, and let it air dry away from direct sunlight or heat. This method preserves the bag's shape and keeps those colors vibrant.
Storage Suggestions
When your granny square bag isn't on display, give it a restful retreat. Store it in a cool, dry place where it can breathe – think cotton pillowcase or fabric storage bag rather than airtight plastic.
If you're storing it long-term, stuff it lightly with acid-free tissue paper to help maintain its shape. Avoid hanging your bag by the straps, as this can cause stretching over time. Instead, lay it flat or stand it upright in a drawer or on a shelf.
Pro tip: tuck in a lavender sachet to keep your bag smelling fresh and to naturally deter any unwanted critters.
With proper storage, your granny square creation will always be ready for its next outing!

What's Next
Just hooked this adorable Granny Square Shoulder Bag? Show off your crochet creation on Facebook, Pinterest, Instagram, or Twitter! Use #GrannySquareBag to join our crafty community. Whether you're a beginner or a pro, your unique bag can inspire others. Let's spread the granny square love across social media!


