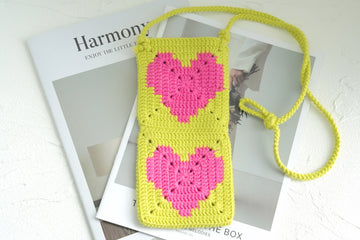
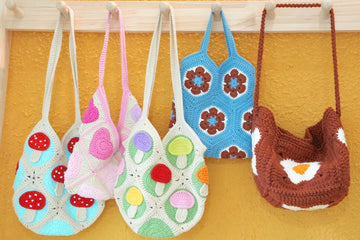
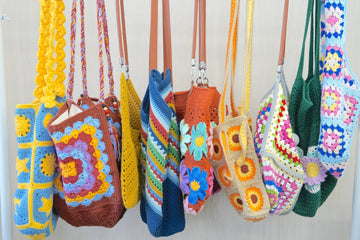
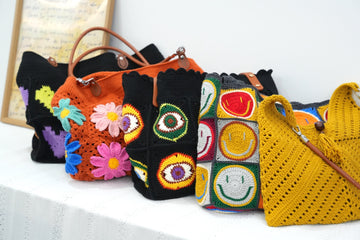
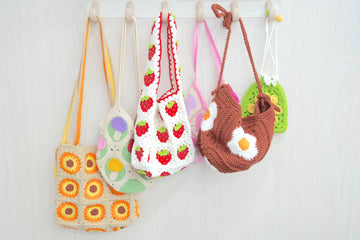
Looking for a fun and adorable crochet project? Let me introduce you to the Granny Square Mini Bag - a charming accessory that's sure to steal hearts!
This cute little bag features vibrant heart-shaped granny squares in eye-catching colors, perfect for adding a pop of personality to any outfit. Whether you're a seasoned crocheter or just starting out, this project is a delightful way to hone your skills and create something truly special.
Ready to get started? I've got you covered with a detailed, step-by-step guide and clear pattern instructions coming right up. So grab your hook and let's dive into this adorable crochet adventure together!
Pin for later
Pin this pattern now and get ready to crochet the cutest mini bag that'll have everyone asking where you got it!

Details About Granny Square Mini Bag
Let's dive into the nitty-gritty of our adorable Granny Square Mini Bag. Each granny square is a perfect little 4.5-inch (11 cm) square - just the right size to show off those heart shapes without overwhelming your project.
Now, here's the fun part: we'll be using four of these squares to create our bag. Two for the front, two for the back - it's like putting together a tiny, colorful puzzle! Once assembled, your finished bag will measure about 9 inches (23 cm) in height and 4.5 inches (11 cm) in width. It's the perfect size for carrying your essentials or making a statement at your next outing.
As for colors, we have many options! In our example, we've gone with a vibrant lime green background that really makes those pink hearts pop. But don't let that limit you! Why not try a classic red and white combo for a retro vibe? Or how about pastel blue with yellow hearts for a sweet, springtime feel? The sky's the limit - pick colors that make your heart sing!
Remember, this little bag is all about expressing your personality. So go wild, mix and match, and most importantly, have fun with it!
Recommended Yarn and Crochet Hooks
Let's talk about the good stuff - yarn and hooks for our adorable Granny Square Mini Bag!
First up, yarn choices. I'm absolutely in love with Loopara 5 ply milk cotton yarn for this project. It's so soft and lightweight, perfect for a bag you'll want to use for a long time. Plus, it comes in a rainbow of colors that'll make your heart sing!
For our bag, we're using a vibrant lime green and a juicy pink, but feel free to let your creativity run wild. How about a sunny yellow with sky blue hearts? Or maybe a deep purple with white hearts for a bit of drama? The possibilities are endless!
Now, let's talk hooks. We're using a 3.0mm hook for this project, which is just right for creating tight, neat stitches with our 5 ply yarn. This size gives you granny squares that are sturdy enough for a bag, but still have that lovely, lacy look we all adore.
Speaking of granny squares, can we just take a moment to appreciate how perfect they are for this project? They work up quickly, they're great for using up those yarn leftovers, and they give you the freedom to play with color combos to your heart's content. Plus, they're just so darn cute!
Materials needed for Granny Square Mini Bag
- Yarn – Loopara 5ply combed cotton
- Hook – 3.0mm
- Scissors
- Yarn Needle

Abbreviations (US Terms)
- ch - chain
- sl - slip stitch
- dc - double crochet
- inc - increase
Granny Square Mini Bag Layout

This Granny Square Mini Bag layout shows how four heart-shaped granny squares come together to form an adorable, compact bag. The diagram illustrates the placement and orientation of each square, helping you visualize the final product and ensuring proper assembly for a charming, functional accessory.
How to Crochet Granny Square Mini Bag – Step by Step
Note: The tutorial uses different yarn colors for the crocheting and assembly processes. You can choose whatever color you like. If you’re not crazy about our color palette, I put together two color-changing techniques that I use for all of my projects. Let me show you how to make these color transitions smooth and professional so you can bring your unique, creative vision to life.


Round 1: Using red yarn, make a magic ring. Chain 3, 2 double crochet, chain 2. (3 double crochet, chain 2) repeat 3 times. Slip stitch into the top of the beginning chain-3. Fasten off.


Round 2: (Chain 3, double crochet, chain 2, double crochet increase), 3 double crochet, [(double crochet increase, chain 2, double crochet increase), 3 double crochet] repeat 3 times, slip stitch into the top of the beginning chain-3.
Tip: Use invisible join for color changes from round 3 onwards.


Round 3: 2 slip stitch, (chain 3, double crochet, chain 2, double crochet increase), 2 double crochet, change to white yarn, 3 double crochet, cut white yarn, change to red yarn, 2 double crochet, [(double crochet increase, chain 2, double crochet increase), 7 double crochet] repeat 3 times, slip stitch into the top of the beginning chain-3.


Round 4: 2 slip stitch, (chain 3, double crochet, chain 2, double crochet increase), 2 double crochet, change to white yarn, 7 double crochet, change to red yarn, 2 double crochet, (double crochet increase, chain 2, double crochet increase), 9 double crochet, change to white yarn, 2 double crochet, (double crochet increase, chain 2, double crochet increase), 2 double crochet, change to red yarn, 7 double crochet, change to white yarn, 2 double crochet, (double crochet increase, chain 2, double crochet increase), 2 double crochet, change to red yarn, 9 double crochet. Cut red yarn.


Round 5: Change to white yarn, (chain 3, double crochet, chain 2, double crochet increase), 15 double crochet, (double crochet increase, chain 2, double crochet increase), 2 double crochet, change to red yarn, 7 double crochet, change to white yarn, 6 double crochet,(double crochet increase, chain 2, double crochet increase), 6 double crochet, change to red yarn, 3 double crochet, change to white yarn, 6 double crochet, (double crochet increase, chain 2, double crochet increase), 6 double crochet, change to red yarn, 7 double crochet, cut red yarn, change to white yarn,2 double crochet. Slip stitch into the top of the beginning chain-3.

Round 6: 2 slip stitch, (chain 3, double crochet, chain 2, double crochet increase), 19 double crochet, [(double crochet increase, chain 2, double crochet increase), 19 double crochet] repeat 3 times, slip stitch into the top of the beginning chain-3. Fasten off and weave in all ends.

Tips: Block your squares before assembling. This helps even out any slight size differences and makes your bag look super professional. When working the heart pattern, pay extra attention to where you place your color changes. It's what gives the heart its shape.
Crochet Granny Square Mini Bag Assemble
How to Assemble Bag Body:


Step 1. Four heart-shaped granny squares are needed. Use the method shown in the picture for Roll stitch seaming. Then, align the stitches precisely, with the wrong sides facing each other. Pick up the inside loops of each stitch for Roll stitch seaming.

Step 2. Start by joining granny squares 1 and 2. For the first stitch, sew twice in the same stitch to secure the seam. Don't pull the thread too tight to maintain the bag's shape.

Step 3. Continue joining stitches one by one.

Step 4. Complete the seam between granny squares 1 and 2.

Step 5. Next, connect granny squares 3 and 4. Thread through the inside loops of both squares 3 and 4 in one pass.

Step 6. Continue seaming the remaining stitches one by one.


Step 7. Seam center line 2 using the same method as center line 1.


Step 8. Finally, fold the bag with the wrong sides together. Sew the bottom and sides to complete the bag.

Step 9. The assembly is now complete.
Tips: Before you start seaming, lay out all four squares in the correct orientation. This helps you visualize the final product and avoid mistakes.
How to Assemble Bag Strap:


Step 1. Chain 2, then single crochet in the second chain from the hook.

Step 2. Turn the work, pick up one loop from the left side, yarn over and pull through both loops.


Step 3. Turn again, pick up two loops from the left side, yarn over and pull through two loops, then yarn over and pull through the remaining two loops.

Step 4. Repeat step 3 until the strap reaches the desired length.


Step 5. Once the strap is complete, thread it through the holes in the bag body and tie a knot to secure it.

Tips: To determine the perfect strap length, try on the bag and adjust before securing. For added comfort, you could work a few rounds of single crochet along the edges of the strap to make it slightly wider and softer against the shoulder.
How to Join Granny Squares
While I've used one simple joining method in this pattern, you might find another technique that better suits your style. I'm excited to share my comprehensive guide on 11 Ways to Join Granny Squares with you! I've detailed every method I know and love - each brings its own special touch to your finished piece. Let me help you discover which one works best for you!
How to Weave in Ends Crochet Granny Square
The secret for professional-looking granny squares is all about how you weave in those ends. I'm sharing 3 ways to weave in ends with you! These are techniques I've perfected over years of crocheting and use in all my projects. I'll show you exactly how I secure my ends to make sturdy, polished pieces that last. Trust me, once you master these finishing methods, your granny squares will look absolutely stunning!
Care and Cleaning Instructions
Daily Care Tips
Want to keep your adorable Granny Square Mini Bag looking fresh and fabulous? It's super easy! Just give it a gentle brush with a soft-bristled brush every now and then to keep those stitches looking crisp. If you notice any loose threads, don't panic! Simply tuck them back in with a crochet hook. And remember, your bag loves a good airing out after use - it keeps it smelling sweet and prevents any unwanted moisture build-up.
Washing Methods
Did your mini bag have a little adventure and get dirty? No worries! Here's the lowdown on keeping it clean: First, always go for hand washing - it's gentler and shows your bag some love. Use cool water and a mild detergent (the kind you'd use for your sweater). Gently swish it around - no rough stuff! Rinse thoroughly until the water runs clear, then squeeze out excess water. Never wring it out - that's a big no-no for crochet items. Instead, roll it in a towel to remove more water, then reshape and lay flat to dry.
Storage Suggestions
Let's talk about giving your Granny Square Mini Bag a cozy home when it's not out and about! Keep it somewhere cool and dry. Avoid damp places like bathrooms - they're not your bag's friend. If you're storing it for a while, stuff it with acid-free tissue paper to help it keep its shape - it's like a little spa treatment for your bag! For extra protection, tuck it into a cotton pillowcase before placing it in your closet. This keeps dust at bay and lets your bag breathe. And here's a quirky tip: toss in a lavender sachet to keep your bag smelling amazing.

What’s Next?
Hey crochet lovers! Did you enjoy this Granny Square Mini Bag tutorial? Why not spread the joy? Share this pattern on Facebook, Pinterest, Instagram, or Twitter and let's create a wave of adorable mini bags! Your friends will thank you for introducing them to their next favorite project. Let's crochet the world a little cuter, one square at a time!


