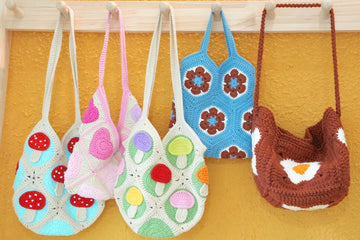
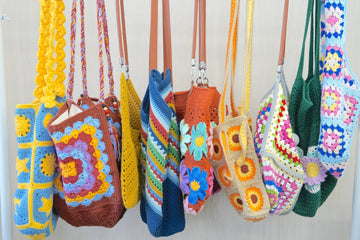
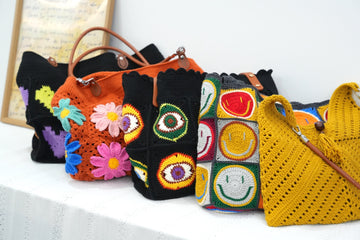
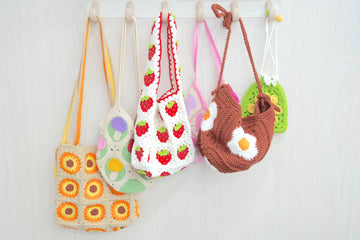
Looking for a fun and practical crochet project? Let me introduce you to the Granny Square Phone Bag - a charming accessory that combines nostalgic crafting with everyday functionality!
This sweet little bag features classic granny squares worked in your favorite colors, creating the perfect cozy home for your smartphone. Not only is it practical, but it also adds a touch of handmade charm to your daily adventures. Whether you're heading to a coffee date or enjoying a weekend outing, this bag keeps your phone secure while showcasing your crochet skills.
Ready to create your own? I've put together detailed, step-by-step instructions with clear photos to guide you through every stitch. So grab your hook and favorite yarns - let's craft something special together!
Pin for Later
Save this adorable Granny Square Phone Bag pattern for your next cozy crafting session!

Details About Granny Square Phone Bag
Let's talk about all the delightful details of this Granny Square Phone Bag!
Each granny square measures approximately 3.5 inches across, and you'll need four of these lovely squares to create your bag - two for the front and two for the back. When assembled, the finished bag stands 8 inches tall and 4.7 inches wide, making it the perfect size to securely hold most smartphones while still being compact and easy to carry.
As for color combinations, this is where you can really let your creativity shine! I personally love working with a palette of three coordinating colors to create a cohesive look. You might try a cheerful combination of dusty pink, cream, and sage green for a vintage vibe, or go bold with navy, yellow, and white for a more modern feel. The traditional granny square pattern really pops when you alternate colors between rounds, creating that beautiful, eye-catching effect we all love.
Remember, these are just suggestions - feel free to play around with colors that match your personal style or use up those beautiful yarn leftovers from your stash! The joy of this pattern is how versatile it is.
Recommended Yarn and Crochet Hooks
Let's talk about the materials you'll need to create this charming phone bag!
For this project, I highly recommend using Loopara 5 ply milk cotton yarn - it's perfect for granny squares as it has just the right weight and creates beautifully defined stitches. The cotton blend gives your bag that soft, pleasant texture while maintaining its shape nicely. Plus, the yarn is incredibly durable, which is essential for a bag that'll be used daily!
For the hook size, we'll be working with a 3.0mm crochet hook. This size pairs perfectly with our recommended yarn, creating tight, neat stitches that give your granny squares excellent structure and durability. The smaller hook size also ensures your phone will be securely held without falling through any gaps in the pattern.
When it comes to colors, the possibilities are endless! I suggest choosing three complementary colors that make you happy. Granny squares work wonderfully with color changes, so this is your chance to play with different combinations and create something uniquely yours. Whether you prefer soft pastels, classic neutrals, or vibrant shades, you can customize the color palette to match your personal style perfectly!
Materials needed for Granny Square Phone Bag
- Yarn – Loopara 5ply combed cotton
- Hook – 3.0mm
- Scissors
- Yarn Needle
- Stitch marker
- Cloth Label
- Lobster clasp

Abbreviations (US Terms)
- Magic ring
- ch - chain
- sl - slip stitch
- sc - single crochet
- hdc - half double crochet
- dc - double crochet
- tr - treble crochet
- dc inc - double crochet increase
- hdc inc - half double crochet increase
How to Crochet Granny Square Phone Bag – Step by Step
Note: The tutorial uses different yarn colors for the crocheting and assembly processes. You can choose whatever color you like.
If you’re not crazy about our color palette, I put together two color-changing techniques that I use for all of my projects. Let me show you how to make these color transitions smooth and professional so you can bring your unique, creative vision to life.

Round 1: Start with a magic ring. Chain 3 (counts as first double crochet). Make 9 double crochet in the ring. Slip stitch to join in top of beginning chain-3.

Round 2: Change to your second color. Chain 2. Work half double crochet increase 9 times around. Work 1 half double crochet. Slip stitch to join in top of beginning chain-2.

Round 3: [Slip stitch, (double crochet, treble crochet), make 3 treble crochet, (treble crochet, double crochet)] repeat 5 times. Slip stitch to join in first slip stitch.

Round 4: Change color. Chain 1. Work half double crochet, 2 double crochet, treble crochet, 2 double crochet, half double crochet. [Work single crochet, half double crochet, 2 double crochet, treble crochet, 2 double crochet, half double crochet] repeat 4 times. Slip stitch to join in first half double crochet.

Round 5: Chain 5. Work treble crochet, double crochet increase, double crochet, half double crochet, 3 single crochet. [Work half double crochet, double crochet, double crochet increase, (treble crochet, chain 1, treble crochet), double crochet increase, double crochet, half double crochet, 3 single crochet] repeat 3 times. Work half double crochet, double crochet, double crochet increase. Slip stitch to join in 3rd chain of beginning chain-5. Fasten off and weave in all ends securely.
Tips: Always count your stitches in each round and use stitch markers to mark the beginning of rounds. This ensures your square stays even and symmetrical as you work through the pattern.
Crochet Granny Square Phone Bag Assemble
How to Seam the Main Body

Step 1: Take your four crocheted pieces. We'll join them together neatly.

Step 2: Place two pieces with right sides facing each other. Pick up the outer chain loops for a whip stitch seam.

Step 3: Match your stitches one by one until you reach the end.

Step 4: Secure and weave in your ends.

Step 5: Repeat this process with the remaining pieces.
How to Crochet the Bag Border

Step 1: Begin with a slip knot.

Step 2: Chain 6, chain 1, 6 single crochet turn your work.

Step 3: Change colors on the last incomplete stitch of row 3.

Step 4: Continue this pattern until it matches three sides of your seamed pieces. Secure with stitch markers to hold in place.
How to Make the Final Stitching

Step 1: With wrong sides up, align border with main piece, matching openings. Use whip stitch to join border to main piece.

Step 2: No need to match stitches exactly - place border stitches where they fit naturally.

Step 3: Complete one side, secure and weave in ends.

Step 4: Take the other side, position wrong side up, and repeat seaming.

Step 5: Turn work right side out when complete.

Step 6: Work a round of red single crochet through outer half stitches.

Step 7: Add another round of single crochet along the opening.

Step 8: Fasten off and repeat on the other side.

Step 9: Work two rounds of blue and one round of yellow single crochet at the opening.
How to Crochet the Strap

Step 1: Start with red yarn and a slip knot.

Step 2: Chain 2, single crochet in second chain from hook.

Step 3: Turn work and single crochet through both side strands.

Step 4: Continue working through both side strands for each stitch.

Step 5: Work to desired length for strap. Attach to button securely.

Step 6: Fasten to bag opening.

Step 7: Sew label to bag opening.
Tips: When assembling your phone bag, pin the granny squares together before seaming to ensure perfect alignment. Use a consistent tension when joining to create neat, sturdy seams that will hold up to daily use.
How to Join Granny Squares
While I've used one simple joining method in this pattern, you might find another technique that better suits your style. I'm excited to share my comprehensive guide on 11 Ways to Join Granny Squares with you! I've detailed every method I know and love - each brings its own special touch to your finished piece. Let me help you discover which one works best for you!
How to Weave in Ends Crochet Granny Square
The secret for professional-looking granny squares is all about how you weave in those ends. I'm sharing 3 ways to weave in ends with you! These are techniques I've perfected over years of crocheting and use in all my projects. I'll show you exactly how I secure my ends to make sturdy, polished pieces that last. Trust me, once you master these finishing methods, your granny squares will look absolutely stunning!
Care and Cleaning Instructions
Daily Care Tips
Keep your granny square phone bag looking its best by handling it gently and avoiding overstretching. Give it a quick brush with your hands after each use to remove any dust or debris, and be mindful of sharp objects that might snag the stitches.
Washing Methods
When your bag needs cleaning, hand wash it with mild soap in lukewarm water. Gently squeeze - never wring or twist - to avoid distorting the shape. Lay it flat to dry on a clean towel away from direct sunlight, and reshape while damp to maintain those perfect squares.
Storage Suggestions
Store your phone bag in a cool, dry place when not in use. Avoid hanging it by the strap, which can cause stretching. Instead, lay it flat in a drawer or fabric storage box to help maintain its shape and protect those beautiful granny squares you worked so hard to create.

What’s Next?
Enjoyed making this charming phone bag? Share your creation with fellow crocheters! Tag me on Instagram, pin it on Pinterest, or share your finished piece on Facebook and Twitter. I'd love to see your color combinations and how you've made this pattern your own! #GrannySquarePhoneBag #CrochetAccessories


