Alright, pumpkin pals! Get ready to spice up your crochet game with the cutest Pumpkin Granny Square you've ever seen. This beginner-friendly pattern whips up a charming 3.5-inch square that's as sweet as pumpkin pie. Perfect for jazzing up your fall decor or creating the coziest autumn blanket ever!
Ever wondered why we love pumpkins so much? They're not just for pie – these jolly orange orbs have been brightening up harvests for centuries! Now you can capture that cozy fall feeling in your very own handmade treasures. Think snuggly throws, charming table runners, or even a quirky Halloween costume (pumpkin poncho, anyone?).
I've brewed up some easy-to-follow steps and visual guides to help you along. So, grab your favorite orange yarn, and let's turn your hook into a magic wand. It's time to conjure up some pumpkin patch perfection!
Pin for Later
Pin this Pumpkin Granny Square pattern and bring the cozy charm of autumn to your crochet projects all year round!

Recommended Yarn and Crochet Hooks
Let's talk yarn and hooks for your Pumpkin Granny Square adventure!
First up, yarn. Folks, I'm head over heels for Loopara milk cotton yarn for these little pumpkin patches. It's softer than a kitten's belly and has a sheen that'll make your stitches pop like fireworks! Plus, it's gentle on your hands and tough enough to survive countless "It's the Great Pumpkin, Charlie Brown" marathons.
For colors, we're obviously diving into the orange palette. But don't just grab any old orange! I'm talking warm, rich shades that'll make your squares look good enough to eat. Throw in some deep greens for stems and leaves, and maybe a touch of brown for that authentic pumpkin patch feel.
Now, about that hook – we're rocking a 2.3mm for this project. It's like the Cinderella of hook sizes for our pumpkin – not too big, not too small, just right! It'll give you nice, tight stitches that really define those pumpkin curves.
Remember, granny squares are the ultimate portable project. Toss your yarn and hook in your trick-or-treat bag, and you can stitch up a storm wherever the fall winds take you! Before you know it, you'll have a patch of crochet pumpkins ready to decorate your house, your bag, or even your cat (if they'll let you).
So, grab those hooks and let's get this pumpkin party started! It's time to make autumn proud!
Materials needed for Pumpkin Granny Square
- Yarn– Loopara 4ply combed cotton (Apricot 04, Green 15, Orange 49 and Black 90)
- Hook- 2.3mm
- Hot melt adhesive
- Stitch Marker
- Scissors
- Yarn Needle

Abbreviations (US Terms)
- ch - chain
- sc - single crochet
- hdc - half double crochet
- dc - double crochet
- tr - treble crochet
- dtr - double treble crochet
- sl - slip stitch
- sc2tog - single crochet two together
- Magic ring
- inc - increase (typically worked as 2 stitches in the same stitch)
How to Crochet a Pumpkin Granny Square– Step by Step
How to Crochet a Base (Make 1)

Round 1: Chain 3, work 11 double crochets into a ring. Slip stitch to join.

Round 2: Chain 3, double crochet in the same stitch. Then work a double crochet increase 11 times around. Slip stitch to join.

Round 3: Chain 3, work (double crochet increase, double crochet) 11 times, then one more double crochet. Slip stitch to join.

Round 4: Chain 3, work (double crochet, double crochet increase, double crochet) 11 times, then one more double crochet. Slip stitch to join.

Round 5: Chain 3, work (2 double crochets, double crochet increase, double crochet) 11 times, then 2 more double crochets. Slip stitch to join.

Round 6: Work [6 single crochets, half double crochet, 2 double crochets, treble crochet, (2 double treble crochets, chain 2, 2 double treble crochets), treble crochet, 2 double crochets, half double crochet] 4 times. Slip stitch to join.

Round 7: Chain 3, work [11 double crochets, (2 double crochets, chain 2, 2 double crochets) 7 double crochets] 3 times, then 11 double crochets, (2 double crochets, chain 2, 2 double crochets), 6 double crochets. Slip stitch to join.
Tips: When crocheting your pumpkin base, keep your tension consistent for a neat look. Use stitch markers to track rounds, especially the complex ones. Remember, the starting chain 3 counts as a double crochet. Count stitches after each round to stay on track.
How to Crochet a Pumpkin (Make 1)

Round 1: Chain 6. Work 4 single crochets in the 2nd chain from hook, 3 single crochets in the next stitch, 3 single crochets, and 2 single crochets in the last stitch. Slip stitch to join.

Round 2: Chain 1, work 2 single crochets in the first stitch, 3 single crochets, 3 single crochet increases, 3 single crochets, 2 single crochet increases. Slip stitch to join.

Round 3: Chain 1, single crochet, single crochet increase, 3 single crochets, (single crochet, single crochet increase) 3 times, 3 single crochets, (single crochet, single crochet increase) twice. Slip stitch to join.

Round 4: Chain 1, single crochet increase, 5 single crochets, (single crochet increase, 2 single crochets) 3 times, 3 single crochets, (single crochet increase, 2 single crochets) twice. Slip stitch to join.

Round 5: Chain 1, 3 single crochets, single crochet increase, 3 single crochets, (3 single crochets, single crochet increase) 3 times, 3 single crochets, (3 single crochets, single crochet increase) twice. Slip stitch to join.

Round 6: Chain 1, 2 single crochets, single crochet increase, 5 single crochets, (2 single crochets, single crochet increase, 2 single crochets) 3 times, 3 single crochets, (2 single crochets, single crochet increase, 2 single crochets) twice. Slip stitch to join.
Tips: Maintain consistent tension for an even pumpkin shape. Use stitch markers to keep track of your increases.
How to Crochet a Pumpkin Stem

Insert hook in 6th stitch from end. Chain 1, single crochet in next stitch. Chain 4, then 3 single crochets in 2nd chain from hook. Slip stitch in same stitch, then slip stitch in next stitch.
How to Crochet Eyes (Make 2)

Round 1: Using 2 strands of yarn held together, chain 6. Work 5 single crochets in the 2nd chain from hook. Slip stitch to join.

Round 2: Chain 1, work 3 single crochets, then single crochet 2 together (decrease). Slip stitch to join.

Round 3: Chain 1, work 2 single crochets, then single crochet 2 together (decrease). Slip stitch to join.

Round 4: Chain 1, work 1 single crochet, then a single crochet increase in the same stitch. Slip stitch to join.
Round 5: Work a slip stitch to finish.
Remember to make two eyes following these steps.
Tips: Using two strands of yarn creates a thicker, more defined eye. Work tightly to keep the eye shape compact. The decreases in rounds 2 and 3 help create the curved shape of the eye. The increase in round 4 adds a bit of dimension. After finishing, leave a long tail for attaching the eyes to your pumpkin.
Pumpkin Granny Square Assemble

Step 1: Weave in ends.

Step 2: Attach eyes to pumpkin.

Step 3: Embroider mouth with 2 strands.

Step 4: Glue pumpkin to base.
How to Join Granny Squares
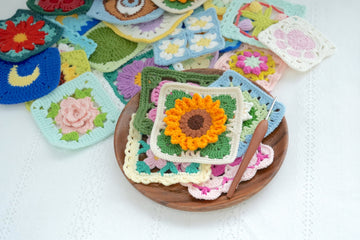
Granny squares are perfect for bags, clothing, and blankets. If you're thinking of making one with those squares, I'm excited to share my comprehensive guide on 11 Ways to Join Granny Squares with you! I've detailed every method I know and love - each brings its own special touch to your finished piece. Let me help you discover which one works best for you!
How to Change Colors in a Granny Square
Are you looking for a different color palette? I totally get it—it’s why I love crochet! If you’re not crazy about our color palette, I put together two color-changing techniques that I use for all of my projects. Let me show you how to make these color transitions smooth and professional so you can bring your unique, creative vision to life.
How to Weave in Ends Crochet Granny Square
The secret for professional-looking granny squares is all about how you weave in those ends. I'm sharing 3 ways to weave in ends with you! These are techniques I've perfected over years of crocheting and use in all my projects. I'll show you exactly how I secure my ends to make sturdy, polished pieces that last. Trust me, once you master these finishing methods, your granny squares will look absolutely stunning!
Care Instructions
Hey there, pumpkin patch pal! Now that you've created your adorable Pumpkin Granny Square, let's chat about keeping it looking gourd-geous for seasons to come!
First up, washing. Trust me, I've learned this the hard way – always hand wash these little cuties! Toss 'em in a sink with lukewarm water and a smidge of gentle detergent. Give 'em a little swish (no rough stuff!), then rinse until the water runs clear. Here's a pro tip: resist the urge to wring them out! Instead, gently squeeze out excess water and lay flat to dry. Your pumpkins will thank you by keeping their plump shape.
Now, let's talk storage. Think of your Pumpkin Granny Squares as precious harvest treasures – they deserve special treatment! Steer clear of plastic bags. Instead, wrap your squares in acid-free tissue paper and tuck them into a breathable container. I use an old pillowcase, but a cardboard box works too. If you're stacking multiple squares, slip some tissue paper between each layer to prevent any sneaky color transfer.
Speaking of color, let's keep those pumpkins vibrant! Store your work away from direct sunlight – it's like kryptonite to yarn. If you're using your squares for something that'll see a lot of sun, consider yarn with built-in UV resistance.
Oh, and here's a little secret – give your squares some TLC every now and then. After washing or if they've been in storage for a while, gently reshape them. If you spot any stubborn creases, a light steam iron can work wonders. Just remember to use a pressing cloth to protect those precious stitches!
With these care tips, your Pumpkin Granny Squares will stay as fresh as the day you picked them from your crochet patch. Happy crafting, and may your autumn be filled with cozy crochet vibes!

What’s Next?
Just crocheted your Pumpkin Granny Square? Show off your harvest of cuteness! Snap a pic of your creation and share it on Instagram with #PumpkinGrannySquare. Pin it on Pinterest to inspire other fall-loving crafters. Tweet your progress and final masterpiece on Twitter. Or post it on Facebook and start a pumpkin patch party with your friends! Don't forget to tag us – your crafty creation might just spark someone else's autumn crochet adventure!