Crocheting a Heart Granny Square is a delightful project that combines the classic granny square technique with a charming heart motif.
Perfect for beginners and intermediate crocheters alike, this 4-inch square can be used in countless ways - from cozy blankets to festive decorations. Whether you're crafting a gift for a loved one or adding a touch of whimsy to your home, this pattern is sure to warm your heart.
Ready to get started? Follow along with our step-by-step guide and helpful images to create your own adorable Heart Granny Square. Let's dive in and spread some crochet love!
Pin for later
Pin this pattern now and spread the love one stitch at a time!

Recommended Yarn and Crochet Hooks
Ready to dive into the heart of our project? For this charming Heart Granny Square, you'll want to choose a yarn that's as lovely to work with as the finished product. I'm absolutely smitten with Loopara milk cotton yarn – it's incredibly soft, shows off your stitches beautifully, and comes in a delightful array of colors. Grab a skein each of red for the heart and white for the background, or mix it up with your favorite color combo!
We're working with a 2.0mm hook for this pattern. I know, it might seem tiny, but it's the key to achieving those crisp, defined stitches that make granny squares so irresistible. This smaller hook size also helps keep your squares nice and tight – perfect if you're planning to join them for a larger project.
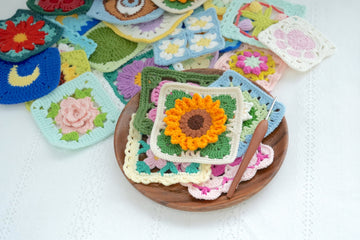
And that's also one of the things I absolutely adore about granny squares – they're incredibly versatile! You can mix and match them for cozy blankets, stylish bags, or even frame them as wall art.
Materials needed for Heart Granny Square
- Yarn – Loopara 4ply combed cotton (White 02 and Red 67)
- Hook – 2.0mm
- Stitch Marker
- Scissors

Abbreviations (US Terms)
- ch - chain
- sl - slip stitch
- dc - double crochet
- Magic ring
- inc - increase
How to Crochet a Heart Granny Square – Step by Step


Round 1: Using red yarn, make a magic ring. Chain 3, 2 double crochet, chain 2. (3 double crochet, chain 2) repeat 3 times. Slip stitch into the top of the beginning chain-3. Fasten off.


Round 2: (Chain 3, double crochet, chain 2, double crochet increase), 3 double crochet, [(double crochet increase, chain 2, double crochet increase), 3 double crochet] repeat 3 times, slip stitch into the top of the beginning chain-3.
Tip: Use invisible join for color changes from round 3 onwards.


Round 3: 2 slip stitch, (chain 3, double crochet, chain 2, double crochet increase), 2 double crochet, change to white yarn, 3 double crochet, cut white yarn, change to red yarn, 2 double crochet, [(double crochet increase, chain 2, double crochet increase), 7 double crochet] repeat 3 times, slip stitch into the top of the beginning chain-3.


Round 4: 2 slip stitch, (chain 3, double crochet, chain 2, double crochet increase), 2 double crochet, change to white yarn, 7 double crochet, change to red yarn, 2 double crochet, (double crochet increase, chain 2, double crochet increase), 9 double crochet, change to white yarn, 2 double crochet, (double crochet increase, chain 2, double crochet increase), 2 double crochet, change to red yarn, 7 double crochet, change to white yarn, 2 double crochet, (double crochet increase, chain 2, double crochet increase), 2 double crochet, change to red yarn, 9 double crochet. Cut red yarn.


Round 5: Change to white yarn, (chain 3, double crochet, chain 2, double crochet increase), 15 double crochet, (double crochet increase, chain 2, double crochet increase), 2 double crochet, change to red yarn, 7 double crochet, change to white yarn, 6 double crochet,(double crochet increase, chain 2, double crochet increase), 6 double crochet, change to red yarn, 3 double crochet, change to white yarn, 6 double crochet, (double crochet increase, chain 2, double crochet increase), 6 double crochet, change to red yarn, 7 double crochet, cut red yarn, change to white yarn,2 double crochet. Slip stitch into the top of the beginning chain-3.

Round 6: 2 slip stitch, (chain 3, double crochet, chain 2, double crochet increase), 19 double crochet, [(double crochet increase, chain 2, double crochet increase), 19 double crochet] repeat 3 times, slip stitch into the top of the beginning chain-3. Fasten off and weave in all ends.

Tips: Take your time with the color changes, especially in rounds 3-5. Keeping your tension consistent will help maintain the shape of your heart. When changing colors, leave longer tails than you think you'll need. This makes weaving in ends easier and more secure.
How to Join Granny Squares
Granny squares are perfect for bags, clothing, and blankets. If you're thinking of making one with those squares, I'm excited to share my comprehensive guide on 11 Ways to Join Granny Squares with you! I've detailed every method I know and love - each brings its own special touch to your finished piece. Let me help you discover which one works best for you!
How to Change Colors in a Granny Square
Are you looking for a different color palette? I totally get it—it’s why I love crochet! If you’re not crazy about our color palette, I put together two color-changing techniques that I use for all of my projects. Let me show you how to make these color transitions smooth and professional so you can bring your unique, creative vision to life.
How to Weave in Ends Crochet Granny Square
The secret for professional-looking granny squares is all about how you weave in those ends. I'm sharing 3 ways to weave in ends with you! These are techniques I've perfected over years of crocheting and use in all my projects. I'll show you exactly how I secure my ends to make sturdy, polished pieces that last. Trust me, once you master these finishing methods, your granny squares will look absolutely stunning!
Care instructions
Alright, crafty pals, let's talk about keeping your Heart Granny Square creations looking as fresh as the day you finished them!
For washing, stick to hand washing in cool water with a mild detergent. Gently squeeze out excess water - no wringing or twisting. Lay flat to dry to maintain the square's shape.
When it comes to storage, keep your projects in a cool, dry place away from direct sunlight. This helps preserve those lovely colors you chose. For individual squares, stack them neatly in a breathable container. Larger items like blankets? Fold loosely to avoid deep creases.
To maintain shape over time, consider blocking your squares occasionally. It's a simple process: dampen, reshape, and let dry flat. This can work wonders for squares that have gotten a bit misshapen from use or storage.
Color fading is always a concern with crochet projects. Minimize direct sunlight exposure when displaying your work. If it's in a sunny spot, rotating it periodically can help ensure even exposure.
Remember, a little care goes a long way. Treat your Heart Granny Square creations with the same attention you put into making them, and they'll continue to bring joy for years to come.

What’s Next?
Love this Heart Granny Square pattern? Spread the joy! Share it on Facebook, Pinterest, Instagram, or Twitter. Your crochet friends will thank you, and who knows? You might inspire someone to pick up a hook and create their own heartwarming project. Let's keep the crochet community growing, one stitch at a time!