Hey there, crochet enthusiasts! Ready to add some edge to your craft projects? Today we're creating a serrated leaf - that bold, jagged beauty that stands out in any foliage arrangement.
This project is ideal for adventurous beginners or intermediate crocheters looking to refine their shaping skills. You'll be working in rows, mastering a combination of stitches to create that distinctive saw-toothed edge. You can complete one leaf in about 20-30 minutes, making it a perfect quick project for when you need a crafting fix.
In the plant world, serrated leaves aren't just for show. They can help some plants catch more sunlight, control water loss, or even defend against hungry insects.
While our crocheted version won't photosynthesize, it'll certainly brighten up your space! So grab your hook, and let's create some lasting greenery that's always in season. Get ready to leaf your mark on the crochet world!
Pin for later

Save this pattern for your next project - you'll want these eye-catching serrated leaves adding a touch of wild beauty to your crochet creations soon!
Serrated Leaf Details & Usage
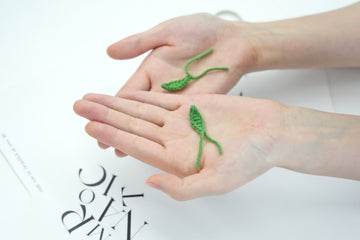
The crocheted serrated leaf typically measures about 15 inches (40cm) in length and 1 inch (2-3 cm) at its widest point, though size can vary depending on your yarn and hook choice.
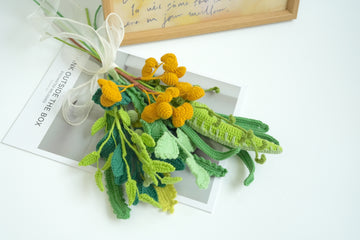
These versatile leaves can be used in numerous ways to add a touch of natural texture to your projects. You can incorporate them into garlands or wreaths for a rustic, woodland-inspired look, or use them as appliques on bags, hats, or clothing for a unique, botanical accent.
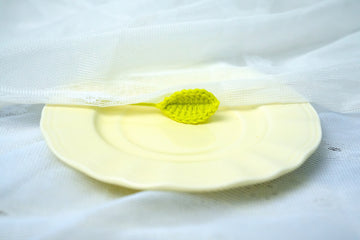
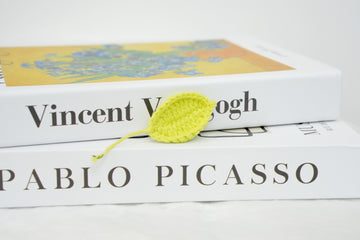
They also make excellent bookmarks or gift tags, and can be arranged as table scatter for nature-themed events. In home decor, use them to embellish picture frames, create unique wall art, or add interest to potted plant arrangements.
For crafters, these leaves are perfect additions to fairy gardens, can be used to create realistic-looking plant displays, or even serve as textural elements in amigurumi projects. Whether used individually or grouped together, these serrated leaves bring a touch of wild beauty to any creation.
Materials needed for
- Yarn – Loopara 4ply combed cotton (Green 12)
- Hook – 2.0mm
- Iron wire – 0.5mm and 0.8mm
- Hot Melt Adhesive
- Stitch Marker
- Needle-nose Pliers
- Scissor

Abbreviations (US Terms)
- ch - chain
- sc - single crochet
- sl - slip stitch
- st - stitch
- rep - repeat
- incomplete sc - incomplete single crochet
Crochet Serrated Leaf Pattern

Round 1: Chain 62. Add wire along the chain for structure. Starting from the second chain from the hook, work 60 single crochets. Work 3 single crochets in the next stitch to create the leaf tip. Work 60 more single crochets down the other side. Slip stitch to join, then chain 1.

Round 2 (Creating the serrated edge):
- Work the following pattern: (slip stitch, 2 incomplete single crochets, chain 2, slip stitch in the side of the 2nd incomplete single crochet, slip stitch in the next stitch)
- Repeat this pattern to the tip
- At the tip, work (single crochet, chain 2, single crochet)
- For the other side, repeat the serrated edge pattern: (slip stitch, 2 incomplete single crochets, chain 2, slip stitch in the side of the 2nd incomplete single crochet, slip stitch in the next stitch)
- Continue to the end
- Slip stitch to join
Tips: When adding wire in Round 1, be careful not to pierce your stitches. Instead, gently weave it along as you crochet. For the serrated edge in Round 2, maintain consistent tension to ensure even "teeth" along your leaf. The incomplete single crochets are key to creating the jagged edge, so take your time with these stitches.
Crochet Serrated Leaf Assemble

Start wrapping yarn from the bottom of the leaf to the end of the wire. Secure with a little glue at the bottom.
That's it! Your leaf is ready. Doesn't it look great?
Variations
You can get creative with your serrated leaves by experimenting with different shapes and sizes. Try a more elongated leaf by increasing the initial chain count, or create a wider leaf by adding more stitches in the center.
For a maple-like leaf, incorporate additional points by working extra increases at strategic intervals. You could also try a lobed leaf shape by decreasing stitches in certain areas to create indentations. Don't be afraid to play with asymmetry – nature isn't always perfectly balanced!
To add extra realism and texture, consider using a lighter or darker shade of green for surface crochet "veins" along the leaf. For an autumn-inspired look, try working with variegated yarn or blending different shades of red, orange, and yellow. Tiny bobble stitches can mimic leaf texture or galls, while small crocheted insects or ladybugs add a whimsical touch.
Don't forget about the stem – you could wrap it with a different color or add small thorns for certain plant species. Remember, the key to realistic-looking leaves is in the subtle details, so feel free to experiment and make each leaf unique!
What’s Next?
You've just mastered the art of crocheting a stunning serrated leaf! Why keep this botanical brilliance to yourself?
Share your leafy creation on Facebook, Pinterest, Instagram, or Twitter and let your crafty skills shine! Use hashtags like #CrochetSerratedLeaf or #BotanicalCrochet to connect with fellow nature-loving crafters. Your shared pattern might inspire a whole forest of crochet creations!
So go ahead, post that picture of your perfect leaf, and watch as your handmade nature spreads across social media. Let's turn the digital world a little greener, one crocheted leaf at a time!


