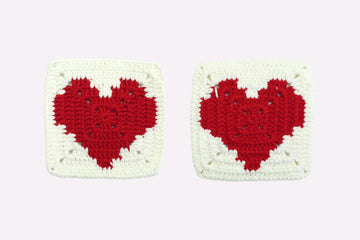
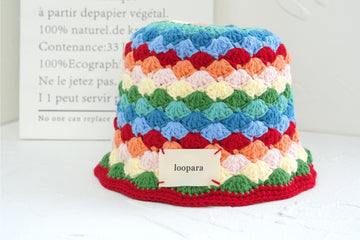
You’ve finished a section of your crochet project – congratulations! But now you’re facing a problem you hadn’t expected. How do you tell which is the right side?!
We’re going to take you through everything you need to know about the right side vs the wrong side in crochet. We’ll explain why it matters (and when it doesn’t). And we’ll share some handy tips to identify the different sides correctly every time.
What is right side and wrong side in crochet?
The key difference between the right and wrong side of crochet is the way it looks. The right side will be neater and more visually appealing, with the stitches better defined. That’s the one you’ll want to be on display.
The wrong side has a useful function too. It’s the place where you can disguise changes in yarn color or hide away knots.
Knowing one side from the other won’t be important for every piece of work you do. If you’re making a gauge swatch, for example, having a “prettier” side won’t a difference.
But even when making something strictly functional, you may need to join different sections correctly.
If you’re following a pattern, you might see references to “RS” (right side) or “WS” (wrong side). It will be telling you to make certain stitches, or to end, on one side or the other.
And if you’re working a repeating stitch pattern with two or more rows, knowing which side is which will help you keep track. That’s especially important if the doorbell rings in the middle of your quiet crocheting afternoon!
All this means it’s important to be able to tell right from wrong. So it’s good news that there are a number of different ways to do exactly that.
How to identify the right side in crochet
The easiest way to spot the right side on a crocheted piece is to see which side looks better. The right side should:
- have uniform, clearly defined stitches
- have smooth transitions between colors
- have no yarn knots
- be less bumpy.
But telling the difference between the sides is more straightforward with some stitches and patterns than others. And if you’re following a pattern, you might prefer a more robust approach.
Let’s take a look at the options.
1. Check the position of the chain tail
This is a very easy method. You just need to know your left from your right.
A traditional chain is the starting point for most crocheted pieces. You’re going to look at the position of the tail end of your chain. What side it appears on, and whether you’re right- or left-handed, will tell you which side you’re looking at.
Lay out your work in front of you with the chain tail at the bottom. If the tail is on the opposite side to your dominant hand, you’re looking at the right side. So:
- If you’re right-handed and the chain tail is at the bottom left, then you’re looking at the right side.
- If you’re right-handed and the chain tail is at the bottom right, then you’re looking at the wrong side.
- If you’re left-handed and the chain tail is at the bottom right, then you’re looking at the right side.
- If you’re left-handed and the chain tail is at the bottom left, then you’re looking at the wrong side.
Note that this all changes if you use a foundation chain. With this method, you combine your starting chain with the first row of crochet stitches.
If you’ve used a foundation chain and you’re right-handed, the tail end of the foundation chain will be on the right-hand side when you’re looking at the right side of the fabric.
The opposite will be true if you’re a lefty – the foundation chain tail will be on the left when the right side of the fabric is facing up.
2. Count the rows
The first row of crochet stitches is the right side of your project. Note, though, that this doesn’t include the starting chain.
This means you can work out which side you’re looking at by counting the number of rows.
- If the number of rows (not including the starting chain) is odd, you’re looking at the right side.
- If the number of rows is even, it’s the wrong side.
If you’re following a pattern, though, check what it says. Occasionally, designers will specify a different side as being “right”.
Once you’ve decided, you can use a stitch marker to mark the right side and avoid having to recount.
3. Look at the shape of the stitches

When you’re working in the round, stitches will look different, depending on whether you’re looking at the right or the wrong side. (Working in the round means stitching in a spiral, rather than using a slip stitch or invisible join to continue.)
When you’re working in the round:
- The side that’s facing you as you work is aways the right side
- The stitches on the right side will be smoother and more uniform than those on the wrong side
- Single crochet stitches will have a “v” shape on the right side. On the wrong side, they’ll have a bar across the top, a bit like the Greek letter π
What about reversible crochet?
Some crochet stitches are designed to produce a fabric that looks exactly the same on the front and back. In other words, both sides will have a mixture of the front and back of stitches. So if you’re crocheting something like this, how do you tell the right side from the wrong?
Well, this is really up to you. If you think one side looks better, pick that!
One way to help decide is to consider which of the stitches appear more prominently in the design. That might be because of their size, color or shape. Then choose the side with the front of those stiches as the right side.
The right side and three-dimensional stitches
While the right side doesn’t really matter with reversible crochet, the opposite is true if you’re working with three-dimensional stitches.
In this case, you need to know which side is which to make sure the finished pattern faces the right way. Some patterns also call for different types of 3-D stitches, and for them all to face in the same direction.
It’s worth taking special care to identify the right and wrong side of your fabric if you’re working with any of these stitches:
- Puff stitches
- Cabling
- Ribbing
- Bobbles
- Petals
- Waves
- Shells
The right side in amigurumi

Amigurumi is the craft of crocheting toys. The general view is that the results are better when the toys are stuffed with the right side of the fabric facing outwards.
The texture on the wrong side is bumpier. And with single crochet stitches, you’ll see “bars” as well as the neat “vs” on the wrong side.
There’s also an issue if the pattern calls for an invisible decrease. The whole point of this is that it shouldn’t be seen. But if you have the wrong side facing out, you’ll see little ridges at the decrease.
The right side in colorwork
Crochet colorwork is where different shades of yarn are used to create patterns and pictures. There are a number of different techniques, including tapestry, intarsia and Fair Isle. But they all require an understanding of the right and wrong side of the crocheted fabric.
That’s because the wrong side of the fabric is where the color changes happen. When you finish with one color, you’ll be left with a strand which needs to be worked into the fabric. This is done on the wrong side, where it won’t be seen.
Colorwork is often used for garments like sweaters. So if you end up with the wrong side facing out, it will look pretty odd!
The right side in crochet blankets

You might think that knowing the right side from the wrong isn’t so important when it comes to making a blanket. Up to a point, you’d be right. The difference in appearance between the two sides will be subtle. And each side will be just as warm as the other!
But blankets are often made by stitching together a series of smaller crochet squares, known as “granny squares”. And if the right sides of some of those squares are next to the wrong sides of others, you’ll see the difference.
So make sure all the squares are the same way up before you stitch them together. You can use stitch markers to avoid confusion.
Right side vs wrong side in crochet: a quickfire summary
Knowing the right side from the wrong side isn’t important for every crochet project. But if you’re following a pattern, making clothes or toys, or doing colorwork, it can be crucial.
The easiest approach is to look for your chain tail. If you’re a lefty, it will be on the bottom right when the right side of the fabric is facing up. If you’re right-handed, it will be on the bottom left.


